
By popular request, I have put together a summary of some of my favourite places around Darwin’s beaches to take photos: when to go and what tides are best.
I hope this helps a couple of people who are looking for somewhere to go tonight!
Don’t forget it’s not only being in the right place at the right time that creates good photos. Here’s some of my other useful tutorials that might help!
Recognising when the light is “good” and how to use it in your photos…. Here
Getting the best colour out of your sunset photos
Taking great photos takes time – lots of research in to the best vantage points, tides and times of day. Luckily, in Darwin we live in a place that is relatively small and easy to get around. So, there is no excuse <i>not</i> to get out there and practice your photography skills!
Tides in Darwin
Darwin has big tides – high highs and low lows, with a tidal variance of over seven metres. This means that every sunset in Darwin is different – the water is always lapping around different rocks, hiding or revealing different details…. or standing mangroves in different depths of water.
It is therefore important to do your research if you are heading out to photograph Darwin’s beaches in that golden hour light.
I use the “Willy Weather” app on my iPhone, for tide times. Why?
- The app has an interactive graph so you can select any single point in time and see what the tide level is at that exact time.
- The graph also includes sunrise and sunset times in correlation to the tide times. You can see exactly what level the tide is at, at sunrise and sunset (perfect photo times!)
- It is important to know if the tide is coming in or out, as well as what level it will be at. You don’t want to risk being cut off by water!
- Willy Weather also incorporates moonrise/moonset times, as well as weather, sunrise and sunset times. All the things you need to know for photography!
Locations for sunset and beach photography in Darwin
All of the below locations are easily accessible to anyone with a car in Darwin. Most of them are easily accessible by bus too – if you are a visitor to Darwin and don’t have a car, feel free to get in touch with me and I can give you some advice on places you can easily access!
We’ll start close to town…..
Mindil Beach
An old favourite, with tourists and locals!
Most people will know that Mindil is a great place to watch the sunset!
- Avoid Thursday and Sunday evenings in the dry season – the Mindil Beach Markets are on, which bring around 10,000 people a week to the beach on those two days!
TIDE TIPS
- Anything over 4m – the water is up at the rocks on the northern side of the beach (turn right when entering the beach)
- Preferably under 6m – anything higher than 6m and the interesting rocks at the northern end of the beach are under water (Darwin High School end).
- If the tide is coming in, and you are right at the northern corner, watch out for a creek that will fill up behind you!
- If the rocks aren’t your thing you can hang out in the middle of the beach – if the tide is going out and it is 5m or lower – the wet sand provides some great reflections. In the wet season there’s often lots of driftwood to play with too!
Vestey’s Beach
Vestey’s Beach is the next beach up from Mindil (if heading out of town). It is accessed easiest from the boat ramp next to the Darwin Ski Club: the beach that sits in front of the Northern Territory Museum.
I reckon Vestey’s is an underrated beach – it has some really interesting rocks (at the right tide), it is generally a quiet beach and it is really easy to access (not far to walk).
TIDE TIPS
- From 3.5m – 5m tide is best. I really like the rocks at the southern end of the beach (turn left on to the beach if you are walking down the boat ramp).
- It doesn’t really matter if it’s coming in or going out – the tide won’t cut you off here.
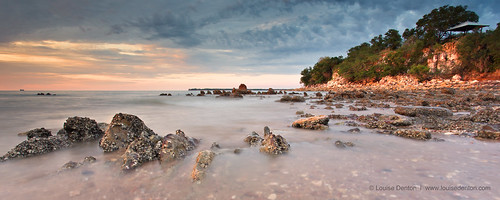
East Point
East Point is quite a big area to cover – there are lots of little nooks and crannies to explore! I’ve included a couple of maps here to highlight where I am referring to…. I’ve done lots of exploring around here and found some nice areas to shoot (and around Nightcliff, a little further in to this article). This section is a summary of my favourite East Point locations!
1. Start at the beginning of East Point road, and park as soon as you turn off the main road. I’ve indicated the nearest parking area on the image below!

From that car park area, you will need to cut straight across the grass area, toward the beach. There are two or three different pathways there (not paved paths, they are just tracks people have made over the years!), that take you down to the beach.
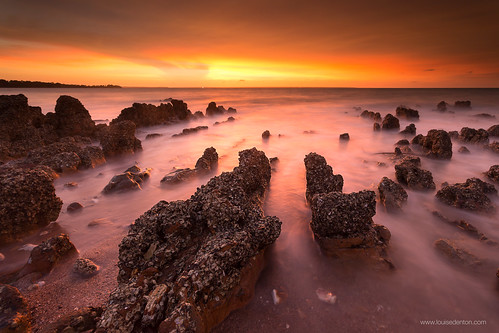
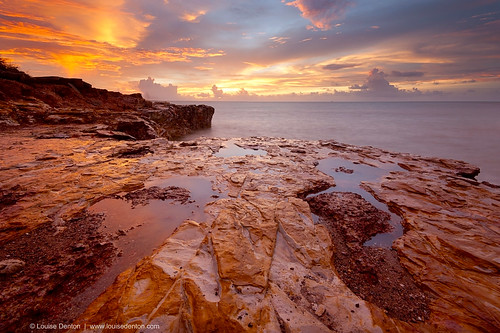
This location has some really cool rock formations – colours, patterns and shapes. Sunset is best, but saying that I have never been here at sunrise – that might also work.
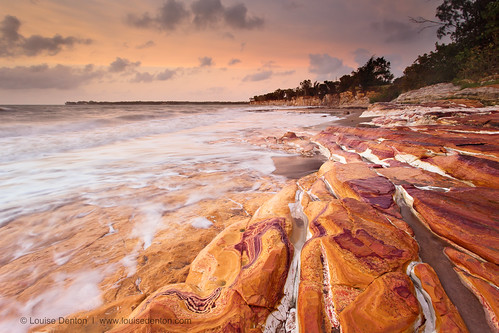
TIDE TIPS
- This spot needs a high tide for the awesome stripey red rocks to be in the water. I mean like a really high high, 6.5m plus is best – if you can get it at 7m that’s even better!
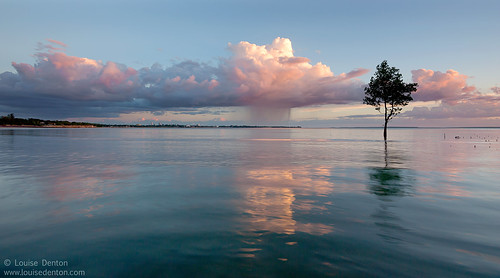
2. Some of my favourite mangroves are at East Point! See the below map: showing the red circle with “mangroves”.
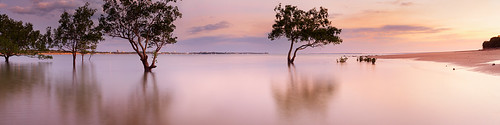
These trees are not photographable (new word?) with the sunset behind them… sun goes down behind East Point itself. However, in the wet season when there is more cloud cover to light up the sky, these trees create an awesome silhouette.
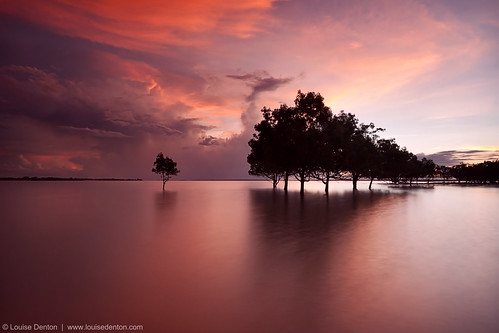
TIDE TIPS
- Between 4 and 4.5m tides. Any higher and too much of the trees are covered. Any lower and you’ll have to walk out on to the mud flats, and that’s not fun, believe me!! 😛

3. Dudley Point look out is a good look out to the city.
- However, you will need a big zoom lens to fill the frame with the city skyline (thinking probably 300mm plus).
- Awesome spot to watch the storms roll over the city in the wet season.
- This is a good spot to watch the last golden light, light up the shiny buildings!
- Tide times – doesn’t matter, you’re not near the water here.
4. Rocks/cliffs highlighted on the above map.
- This is a sunset location
- High tide required really, to have the water lapping around the cliffs. Anything over 6m will be best here.
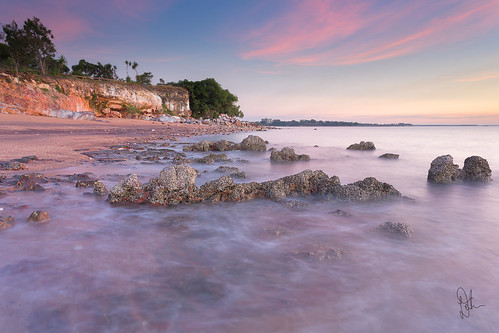
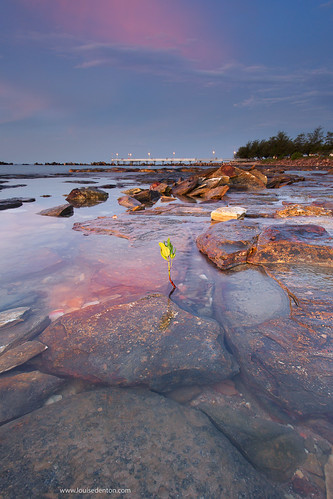
Nightcliff Foreshore area
One of my favourite areas to explore! I reckon you can pretty much photograph from every angle here and find something interesting…. Here are some of my favourites highlighted on a map:

1. Mini Mangroves – this area involves walking around on rocks which are sometimes slippy, so be careful if you trek down here (especially if the tide is going out, leaving wet rocks behind it!)
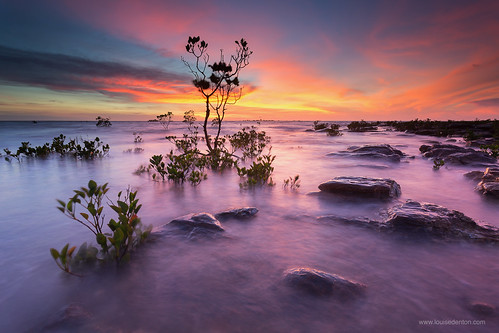
TIDE TIPS
- Anything from 5.5m – 6m means you don’t have to walk too far! The water will be high up the beach and be lapping around the bottom of the mangroves.
- Higher than 6m will work too, but you’ll have to work at walking around, and probably walk through the water a bit.
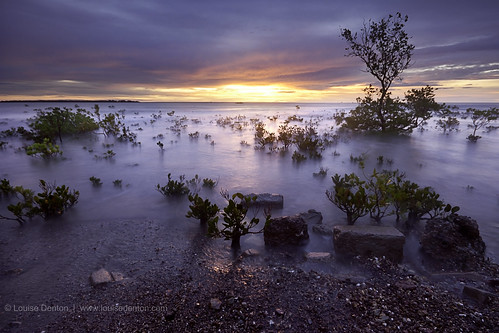
- Less than 5m gets a little tricky to find mangroves without walking to infinity.
- This is definitely a sunset location – use the mangroves as silhouettes!
- Aim for an outgoing tide here – it can be easy to get cut off here and all of a sudden be surrounded by water! The land is very flat but with lots of rocks, nooks and crannies for the water to seep in around you.
2. This is just an alternative spot to photograph the jetty…. This is an angle most beginners overlook, but actually at sunset is probably the preferred vantage point to photograph the jetty – the last light is illuminating it and the rocks in front of it. Depending on how far around you walk you might be able to use some mangroves or rocks as foreground to the jetty.
TIDE TIPS
- Higher tide is best – 6m plus.
3. The jetty! Of course 🙂
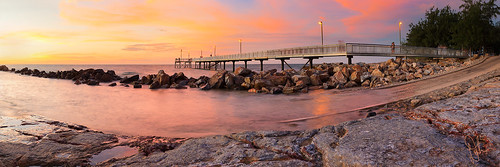
This is one of the most photographed locations in Darwin, but it’s still a good ‘un! Sunset is the classic time to shoot here, but for something different, sunrise comes up from the right and can cast some nice light on to the jetty from the cliffs on the right.
TIDE TIPS
- If you want to shoot the jetty from the cliffs off to the right of the jetty, you’ll need a higher tide (5.5m plus) to hide the mud flats and dark rocks underneath it.
- If you want to try getting under the jetty, you’ll need less than 5m
4. Is the the rocky area underneath Nightcliff pool. If you park in the pool car park and walk as though you were heading back to the jetty, there are some steps off to the right (just near the silver toilet block). Head down those and walk back in the direction of the pool right to the end of the beach. This is a rocky spot great as the last light hits the rocks.
TIDE TIPS
- You’ll need a super tide here! The higher the better, 6.8m plus!
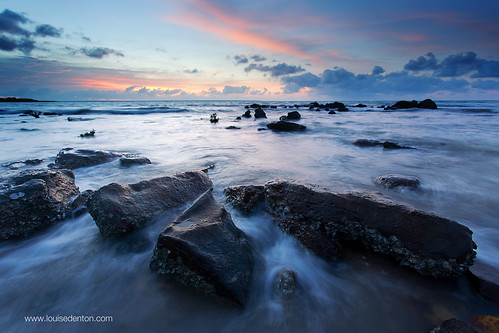
5. The semi-famous finger rocks! These rocks just out in to the ocean and create great leading lines in to the great Darwin sunset! There are also heaps of other bright coloured, patterned rocks here.
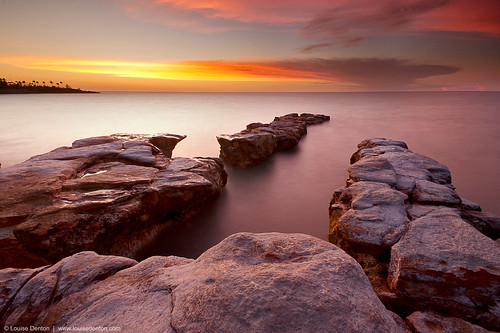
This is a bit tricky to access if you are just trying to get straight on to these rocks, you’ll need to access the beach further around (toward Rapid Creek) and then walk on the beach/rocks to get there. The other alternative is to scale the fence… (not that I recommend that!). Where my circle is on the above map (point 5), there is a car park. You can access the beach here and walk back toward the jetty. Where the rocks start to get higher is the area you are looking for.
TIDE TIPS
- If the tide is too high here, be careful of where you position yourself as the splashes can surprise you!
- I’d recommend 5.5-6m to avoid this. Up to 7m is ok, but you will just need to watch the water.
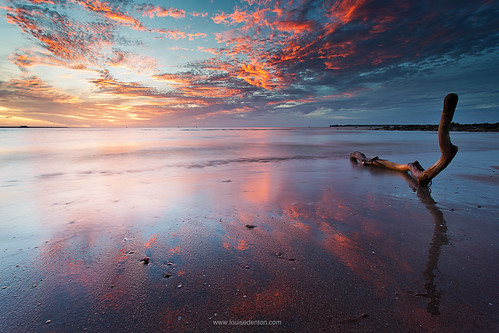
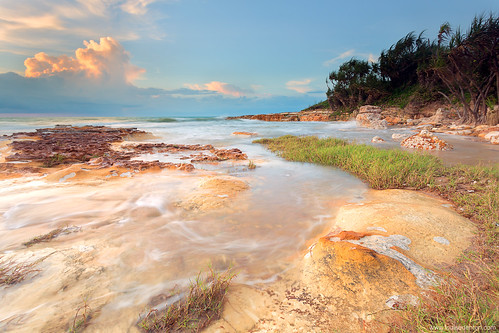
Casuarina Beach
Casuarina Beach is one of my favourites, but not really for photography. Apart from it’s cliffs, it is quite featureless – there are no rocks, no mangroves.
There are a couple of things to play with though. The first is an old fence line – it’s approximate area is circled below.

Basically drive down the gravel track at the end of the main carpark (which is the very end of Trower road if you were looking at the above map), and stop around the second or third path to the beach.
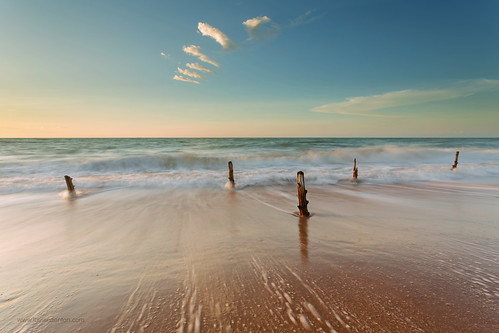
TIDE TIPS
- For the above fence posts, you’ll need around a 7.2m tide, so you can’t get them in the water that often.
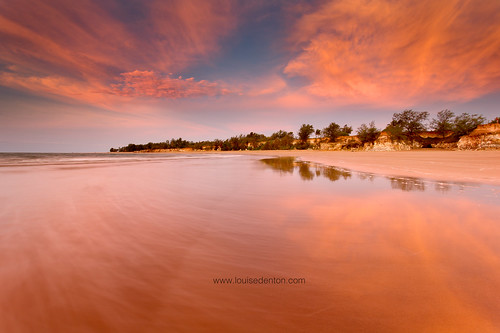
- Other areas of Casuarina Beach (further north of the fence posts), get great reflections on an outgoing tide. You’ll need an outgoing tide, to be at the level of 5m or less.
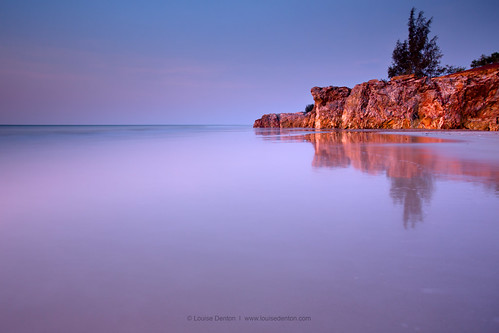
- There are also some good cliffs here, personally I prefer a higher tide so as to get the water in the image. But really you don’t really need to have a high tide.
And I think that’s it!
If you have any other locations around Darwin you would like to know about for photography, feel free to let me know or ask any questions!