
I recently posted about which lenses can be the best for landscape photography – http://wp.me/p3zwhm-51
The general consensus is that wide angle lenses can be the “best” for landscape photography. They exaggerate depth, alter perspective and create that “wide open space” effect that works for those great views!
However, wide angle lenses are amongst the most difficult lenses to get used to.
They do have a different perspective to other lenses and they require specific techniques to use them to their best… To create those photos that really suck you in!
Here are my tips for using a wide angle lens:
1. Get close
The biggest tip I can give you with wide angle lenses (and this can apply to other lenses, and other types of photography), is to get close. Get really, really close to your foreground. Then, just when you think you should be close enough, get even closer!
Wide angle lenses tend to have very short minimum focal distances, meaning you often only need to be 20-30cm away from your foreground and your lens can still focus. And being a wide angle lens, even though you are so close to your foreground you will still encompass that sweeping landscape in the shot.
Why do you need a foreground? Check out my previous blog on composition here – http://wp.me/p3zwhm-27
You generally need an anchor point, a foreground, to “enter” the image with.
Here, the rocks are only around 30cm in front of my lens:
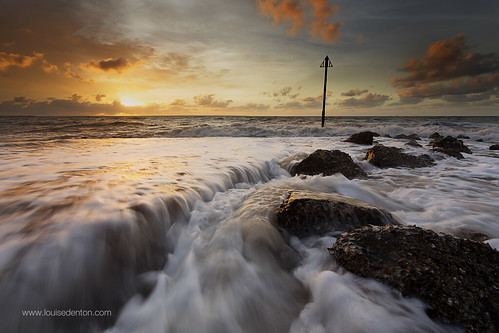
Canon 5D Mark III, 17-40mm F4 L lens at 17mm. ISO100, f9, 1/15th
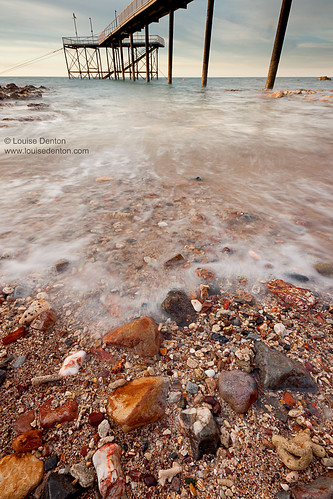
Wide angle lenses need to be really close to the foreground to give it impact in the scene. In the below example I am close enough to the rocks that you can see the details in the shells attached to them:
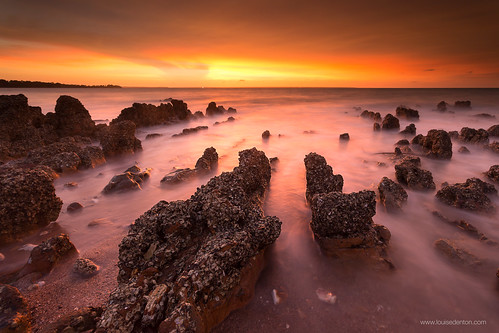
Canon 5D Mark III, 17-40mm F4 L at 17mm
ISO 100, f11, 15 sec
Generally, to get that close to the foreground interest, you need to be close to the ground. I would guess that around 85% of the time I am shooting seascapes, I have my tripod as low to the ground as I can (around 30cm high).
Below: I am crouched low amongst the mangrove roots. The roots and the flowing water provide the lead in to the rest of the scene.
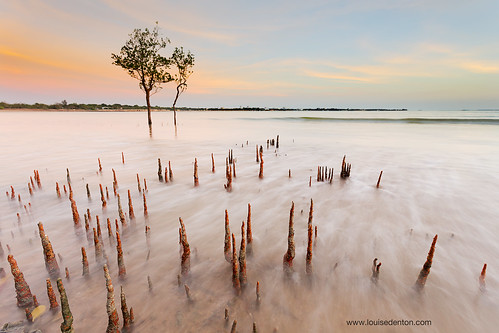
Canon 5D Mark III, 17-40mm F4 L lens at 17mm
ISO 100, f10, 0.8 sec
2. Try shooting vertically
Often, shooting with the camera in a vertical orientation means you can get over the top of your foreground to make it really dominate the front of the frame and lead out to the background horizon and in to that open landscape.
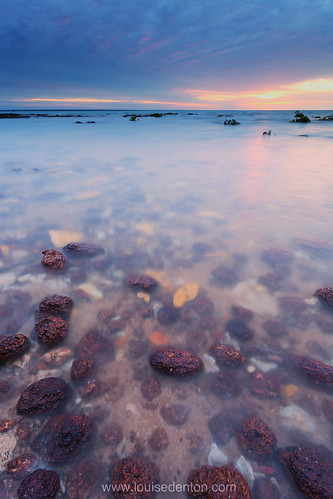
Here my camera is mostly angled downwards, with my tripod low to the ground.
Canon 5D Mark III, 17-40mm F4 L lens at 17mm
ISO 100, f11, 5 sec
Wide angle lenses really work well with dominating foregrounds. The curved perspective of the lens helps with sucking you in to the photo!
And another tip: when shooting vertically with a wide angle lens you will need to pay attention to your tripod legs – keep them out of the photo by having one leg pointing directly backwards with the other two sideways.
By positioning your tripod in the above way, you can create some interesting compositions by straddling the sideways-facing-legs on either side of something. For example here I have a tripod leg on either side of this rock crevice:

Canon 5D Mark III, 17-40mm F4 L lens at 17mm
ISO 100, f10, 2 sec
3. The horizon line – the general rule and the exception to it with wide angle lenses!
Generally with effective, balanced landscape photos we try to keep the sky off of the centre of the photo.
For example, try keeping the sky to a mimimum (around a quarter or a third of the photo), so that you can include more of the foreground and landscape! Wide angle lenses are great for creating the perception of depth:

Canon 450D, Sigma 10-20mm F4-5.6 at 10mm
ISO200, f9, 3 sec
- Canon 450D, Sigma 10-20mm F4-5.6 at 10mm
ISO 100, f19. 126 sec
Canon 450D, Sigma 10-20mm F4-5.6 at 10mm
ISO 100, f13, 0.8 sec
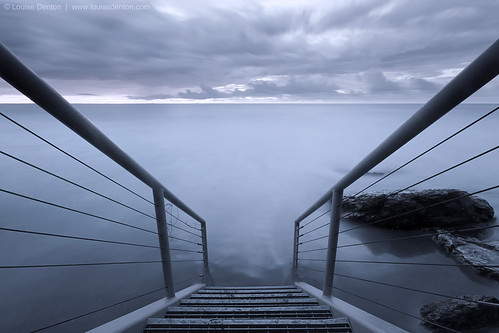
However! And here is the exception to the “rule of thirds” with a wide angle lens….
Wide angle lenses give you distortion due to their perspective. You see how in the last two examples above, the straight vertical lines of the jetty and the stairs are leaning? The verticals of the jetty’s legs actually point out of the photo. And you see the same thing with the poles of the stairs. This is because the camera wasn’t level. It was pointing downwards.
That is tip number 3a (!). With wide angle lenses, if you are photographing buildings or anything that is meant to have straight lines – keep your camera level. It doesn’t matter if your camera is facing horizontally or vertically, but keep the horizon in the middle of the photo! (Or if there is no horizon, imagine where one would be!). Bubble levels can be purchased to attach to your camera.
This effect of wide angle lenses can also be used creatively as shown above with the jetty photo. It can also be corrected in post-production to a certain extent. The extreme distortion is difficult to rectify.
4. Organise your composition
Everything needs to be carefully placed.
Being close to your foreground means that every move you make impacts upon your composition even if you only move a miniscule amount.
Moving left and inch, up an inch and right a bit has a bigger impact on your composition than you think! That can often mean twenty minutes moving around tiny amounts to get your perfect composition.
Think carefully and take note of the little things.
Make sure none of the elements are over lapping.
Check your corners for tree branches and tripod legs!
Watch out for your own shadow! And other intruders unknowingly walking in to your wide-shot!
Can you see a piece of rubbish lying on the ground a few metres away? Your camera will see it to – go and pick it up!
5. Pick your aperture
A lot of landscape photographers use Aperture Priority mode when shooting. This is the “Av” setting on a Canon camera dial, or “A” on a Nikon.
Generally this is because we always use a tripod and so slow shutter speed is not a problem if the chosen aperture gives a slow shutter speed. We are often shooting at low-light times, so slow shutter speeds are a given.
All lenses have a “sweet spot”. That is, the apertures that give the sharpest image quality. In wide angle lenses the “fall off” [of sharpness at the edges of the photo] can be more noticeable. They can also suffer from worse vignetting at some apertures.
So, what aperture should you be using? You can Google-search your own lens to find out your lens’ specific “sweet spot”.
On my Canon 17-40mm F4L is is around F9. However, from f8-f11 is still strong, so for more depth of field I tend to stick around f10 and f11.
Aperture Priority tips for landscape photography:
- I would advise setting aperture between f9 and f11 – it is sharpest (generally).
- F11-f16 is still great for that long depth of field (sharpness throughout the photo).
- F16-f22 loses sharpness, but can be helpful in increasing the shutter speed for artistic effect.
- Less than F8 is not generally desirable for landscape photography as the depth of field can be effected (the whole scene may not be completely sharp).
6. Using polarising filters
Be careful using polarisers with wide angle lenses. I am not going to post any examples (!), but polarisers can create different shading and patterns in the sky when not aligned correctly.
It is generally not advisable to use a polariser with an ultra-wide focal length because it is inevitable you will see evidence of the polariser in the final photo – whether it be shading or banding in the sky, or vignetting in the corners.
Other Useful Resources
This page includes handy diagrams which explain visually how wide angle lenses perceive items in the frame – http://www.cambridgeincolour.com/tutorials/wide-angle-lenses.htm
Ken Rockwell has a very helpful website with lots of reviews and guides, which are very indepth – http://www.kenrockwell.com/tech/how-to-use-ultra-wide-lenses.htm
Some inspiration – some of my favourite ultra-wide angle shots from Flickr! Remember, that with all of these below photos you can click the photo to view more of the artists’ work:
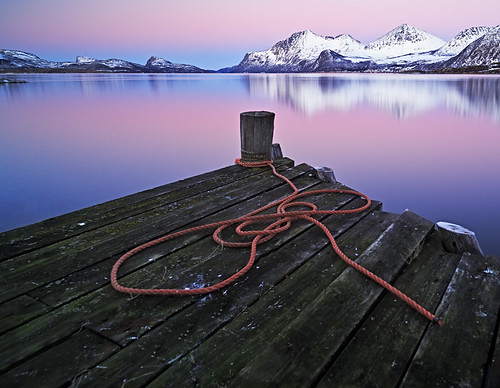
The above from Peter Spencer: see how the jetty and texture of the wood and rope provide a great, close lead in to the scene behind. Also note how everything is carefully placed – that pole doesn’t interfere with the reflection at all.
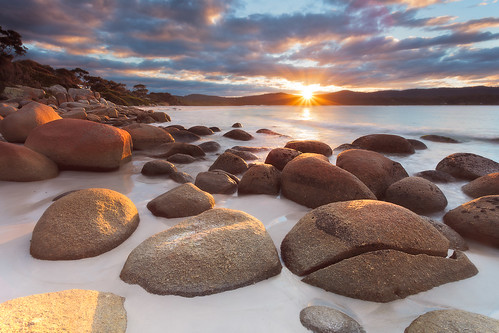
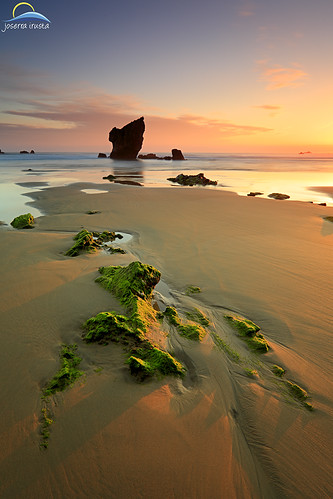 Above from Joserra Irusta shows a great example of shooting vertically – by getting close to the foreground he highlights the light, texture and colour.
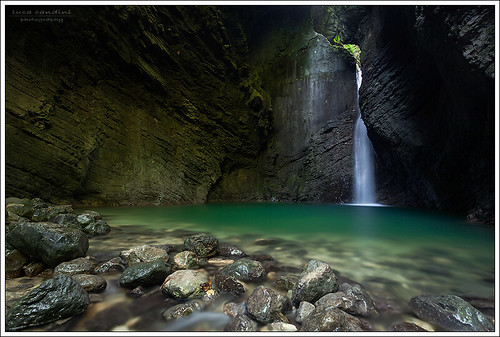 Foreground and framing, is especially important in a small space such as the above from Luca Candin.
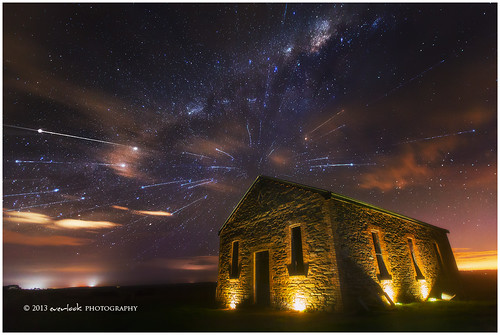
Using the distortion of a wide angle lens can be used creatively – see the below example from Dylan Toh. Yes, the building leans in to the image, but it works perfectly as a lead in to that awesome sky!
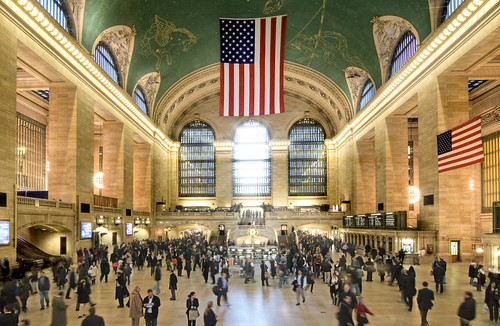 This one above is of a busy station – Grand Central Station in New York. It features a lot of pillars, and Christian has taken the care to eliminate the distortion of his 12mm lens (and eliminating leaning pillars) by keeping the “horizon” central and the camera level.
Try Googling “grand central station” to see other images of this landmark and take note of how the pillars lean in/out of the image when the camera isn’t level. Some work creatively, of course.
Another with that awesome foreground – taken at 17mm by Steve Arnold (a fellow Aussie)
Do you have any experience or questions about using wide angle lenses? Feel free to leave a comment if you have anything to add!