

A common question people ask me about my photos is if the colours are real. The answer is always yes. I very rarely adjust the colours in my photos, and if I do, it is generally a white balance correction (e.g eliminating a green/blue cast in the shadows) or
a contrast adjustment.
I have done a basic walk-through of my processing work through here – http://wp.me/p3zwhm-1j and you will see any adjustments I do are generally quite minor.
Sometimes I do more complex local adjustments for contrast, eg. adjusting only the sky, or using luminosity masks to isolate particular tones in an image to edit. I will be doing another “workflow walkthrough” on an image I have done more editing to.
The ocean and the sunsets are my favourite to photograph – I love the effects long exposures can have on water and the colours in the sky.


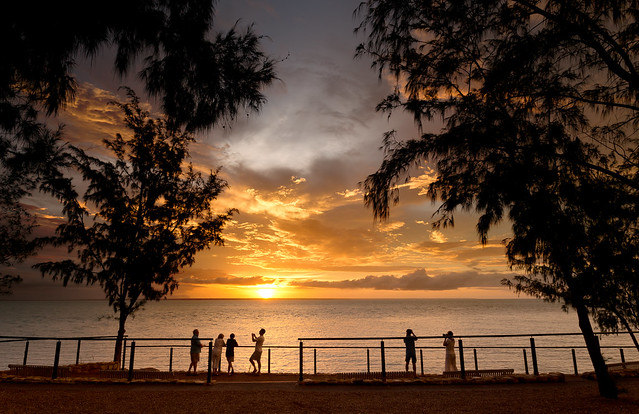
- Sunset over Mindil Beach (East Point is the land on the left)
So, how do you get the awesome colours of a Darwin sunset in your photos?!
There are a few different techniques that all help to increase that colour pop in your SOOC (Straight Out Of Camera) photos. Some of them are basic settings or techniques that help, but other techniques take a bit more practice.
We’ll start with the easy ones!
1. Use the correct White Balance
Maybe this sounds obvious, but make sure you set your white balance setting to the conditions. Generally if we are shooting outside, in daylight, you would set your white balance to “sunny”. If you are shooting in the shade, you would set the white balance to shady. Or if inside under fluro lighting, you might even set it to tungsten!
So, when taking photos at sunset, you want to make sure your white balance is set to “sunny”.
This is particularly important if you shoot JPG files as you will be less able to change these colour profiles in processing. With a RAW file you have a bit more play on correcting white balance. See my post-processing blog (link above) for info on the great JPG vs RAW debate.
By setting your white balance to sunny, your camera will naturally emphasise those warm tones – the reds and yellows typical with a bright sunset, are more pronounced.
2. Set your colour profiles in the camera.
If you use a point and shoot, this would be like using the “scene selection mode”. For example, small cameras have a “sports mode” and a “landscape mode” and a lot even have a “sunset mode”. All sunset mode does is enhance those red/yellow colours and increase the contrast to make it pop. Similarly a landscape mode enhances the greens or sports mode would ensure shutter speeds are quick.
In a DSLR, there are no “scene selection” modes. You are expected to know which settings to use and how to change camera settings to create certain effects.
In a DSLR you can adjust different profiles, and create your own, to suit what you like to shoot. I.e. you can increase the saturation and sharpness to emphasise the colour.
3. Expose correctly
I’m not going to give a lesson on the exposure triangle, nor explain how to expose. I will tell you that it is important with sunsets to check your histogram after your shots. With sunset skies and lots of colour it is easy to blow the highlights. This will lead to a loss of colour and in some more extreme cases will blow the sky out in to portions of bright white.
You will be able to access the histogram in your play back menu. The histogram shows over exposure when the graph is stacked mostly toward the right side of the chart.
Some playback menus will also have a “flashing highlight” capability which can be activated (if not automatic). This saves you even having to look at the histogram – when playing back the images, flashes will appear in areas of over exposure.
4. Have patience!
This photographical skill has a few parts! The main thing to help get sunset colour in your photos is to wait!
Most beginner photographers will wait for the sun to hit the horizon…. and then run off!
This is NOT when the best colour occurs!
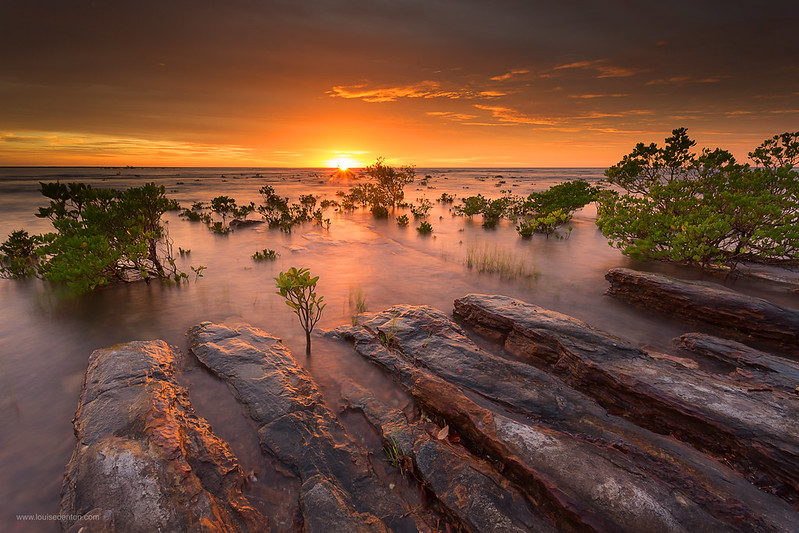
As above, it can be tough to expose a photo when you are pointing the camera straight at the sun. Most of the foreground becomes silhouetted with little detail, and the sky becomes over exposed around the sun. You can see a nice golden glow in the above photo, but there is no vibrant colour in the clouds…. it’s too early!
a) Every sunset is different, but generally the best colour will occur between 5 and 20 minutes after the sun has gone below the horizon. It is not uncommon for me to continue shooting half an hour after sunset.
b) Pay attention. Look around, make note of where the interesting clouds are. The best colour in the sky occurs when there is some cloud for sunlight to shine and reflect off. Check out where the best clouds are – you don’t necessarily have to be pointing the camera in the direction of the sun, sometimes the best skies can be behind you.
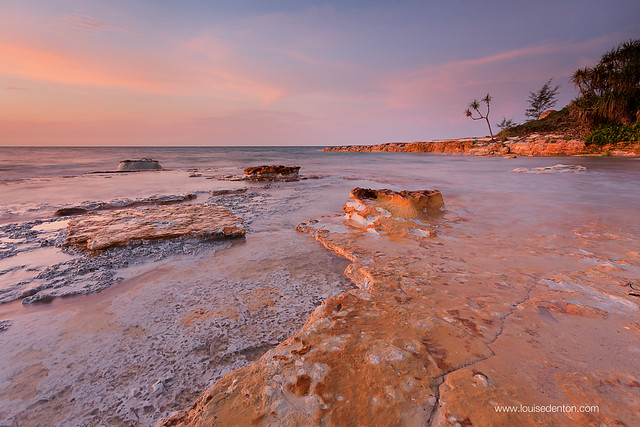
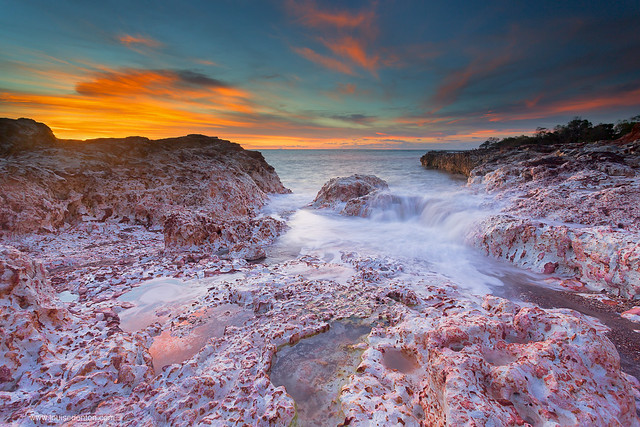
In this example below, the sunset around 90 degrees to the left of where I am pointing the camera. There were not many clouds around that night, so I had to point the camera to where there was just a little bit of action! You can see the highlights on the rocks though from the last light, emphasising their golden colour.
c) Keep looking. As the sunset unfolds, pay attention to your foreground – not just the sky. Often when we have a sky full of colour, those golden red colours in the sky reflect on to the rocks/sand/trees (what ever), making your foreground glow in the sunset colours. Pay attention to what is happening to your landscape, and how you can capture this colour in the camera.
d) Be ready – Darwin experiences great sunsets, the skies we get have awesome colours. Sometimes in photography though, a great sky doesn’t necessarily create a great photo. Photographers are constantly looking for that “good light” and in sunset photography, you really need those skies that make the whole atmosphere and environment glow. Sometimes this period of “good light” might only last for 2 or 5 minutes. You need to be ready and be able to “see” when the “good light” shows itself. That means you have to be aware of your surroundings, keep looking all around you at the ground as well as the sky. Be able to quickly change settings and compositions to adapt to what is unfolding around you.
This sunset below, only showed those red wisps in the cloud for a minute or two and then they were gone…
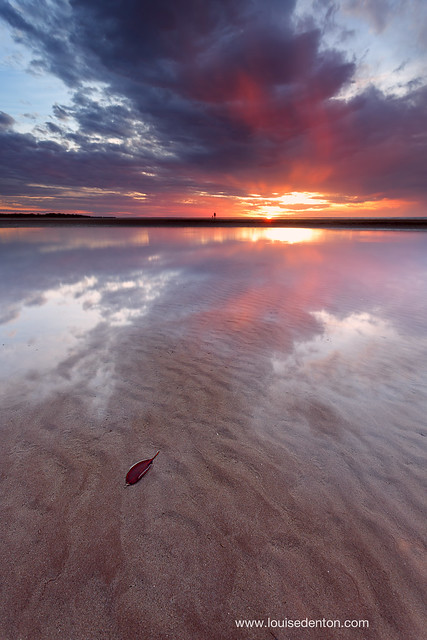
Canon 5D Mark III, 17-40mm F4 L lens at 17mm
ISO 100, f10, 1 sec
It takes time to learn how to see the light. You won’t instantly be able to identify those conditions. But after maybe 500 sunset shoots, you’ll be able to identify when the light is “different” to normal.
e) Make sure you practice!
f). Be patient! It’s not every night we get a sky and sunset that make wall-worthy pictures. Sometimes you have to give up when Mother Nature isn’t going to show off, and try again another night!
5. Use long exposures
You’ll notice as you will be shooting after sunset that lower lighting conditions mean your shutter speed will increase to capture more light.
Don’t worry, if your conditions are darkening around you – your camera can still see (as long as the exposure time is correct).
Using longer exposures tends to bring in more colour. You’ll be surprised at what your camera can capture on a 20 or 30 second exposure when it looks pretty dark around you!
6. Use filters (Or blend exposures)
I use graduated neutral density (GND) filters to keep the exposure correct and even. If the sky is super bright, I stack more than one filter to keep the sky colour from over-exposing. I usually use a 0.9 GND filter by itself and often stack either a 0.3 or a 0.6 GND as well.
You can also buy coloured filters to create a particular effect, for example you can get graduated filters with an orange colour to warm up the sky’s colours.
The problem with sunset photography is that the sky is very bright. You can also over come this without filters – by taking two or more photos to expose each part of the image correctly. I can do a tutorial on this later if anyone is interested? Basically you take one photo to expose for the sky (a darker photo) and one for the foreground (a lighter photo) and blend the two together.
7. Processing
As you will see from the link I posted at the start of this blog, I don’t do too much editing to my photos. If you have the right light and the right composition and settings at the time of the photo, all that remains is a little tweaking.
Don’t be fooled, you cannot make a bad photo turn great with a little bit of Photoshop. You can only make a great photo better!
Remember that a camera is no where near as sophisticated as a human eye – a camera does not see the same tonal range as an eye. The camera will struggle to see and capture the dark shadows and bright highlights with the true strength of an eye. Most pros and advanced photographers will process their images, it’s just how you do it.
I very rarely touch the “hue/saturation” controls. My main adjustments which impact on colour are to do with contrast. I like to play with the contrast in my images which in turn can have an affect on the brightness of colours.
I have also started experimenting with luminosity masks – these are basically contrast adjustments, but instead of adjusting a whole image as if it were one flat tone, using luminosity masks enable local adjustments to each particular tone within the image. E.g. contrast adjustments to the highlights alone, or the super-dark shadows. There is a tutorial on this here – http://www.goodlight.us/writing/luminositymasks/luminositymasks-1.html
This one below was processed with luminosity masks:
Canon 5D Mark III, 17-40mm F4 L lens at 17mm, 0.6 and 0.9 GND filters
ISO 100, f10, 1.6 sec
I occasionally tweak the colour balance controls – mostly only in the shadows and sometimes in the highlights.
The colour is something that you shouldn’t really have to adjust if you able to use natural colour with your camera at the time of the sunset!
A couple of other points to remember:
You are not always going to get a good sunset! Yes, in Darwin we get AWESOME sunsets, but that doesn’t mean every night is perfect. Sometimes you won’t feel like you get a shot, but remember there is always tomorrow!
You just have to ready so that when the sky does deliver you can capture that sunset!

What else can I do to get better colour?
The above is what I do. That is by no means a complete list! That’s the best thing about photography – it is completely subjective and everyone has different ideas and techniques.
If anyone else has any tips to add on how to get the best colour out of a sunset, please feel free to leave a comment below!