
Professional landscape photographer’s always talk about the “light” in their photos.
For me, I agree. To achieve an exceptional landscape photograph, you need to be able to use the light – and wait for the “right” light.
It’s hard to explain how to use the light. You kinda learn, over time, how to see it. What to look for, and why it looks different.
You have to think on your feet really, you have to be ready to observe the changes in light, see the drama in light, see the impact the light can have on the landscape in front of you.
Rather than explain in a technical way, how you can use light in your photography, this blog is a LOT of examples of using light. Hopefully these examples will demonstrate a few techniques, a few ways to use light, and show what to look for.
For you, if you’re a beginner in photography, it could be useful to study each example to quickly evaluate where the light is coming from and where it is visible in the photo – if you can see it in these photos, you will be more ready to look for it “in real life”.
It’s not all about light, you need to be able to compose the scene in front of you as well. But in my opinion, the composition and the light are the most important things in landscape photography – the right settings can help of course. For me, the camera settings fall secondary (thirdly!?) to composition and light. I have previously written an introduction in to composing landscape photography here – http://wp.me/s3zwhm-june2013
How do you use the light?
One of the biggest misconceptions those who are beginning in landscape photography, is that you need to point the camera at the light source, to see it in the photo. For example, beautiful sunset? Point the camera straight at the sun?! Nope…. your photo will result in blown highlights, dark shadows and the colour will be washed out by glare. Not to mention frying your camera sensor and your poor eyes….
With landscape photography, to use the light you need to look for evidence of the light on the landscape.
Here are some examples taken from Flickr*:
*We all now how much I like Flickr, as per one of my recent blogs: http://wp.me/p3zwhm-3i
…. Well that now points straight to another reason as to why Flickr is so awesome – I can share photos straight from Flickr, to my blog and the photos included below if clicked will take you straight to that photographer’s portfolio or Flickr “photo-stream”. Flickr is a great way for others to share your work!
Anyway, here are some examples from Flickr of how to use the light shining on the landscape:
Jeff Lewis of LandESCAPE Photography shoots in the USA’s Sierra country frequently. His photostream is full of gorgeous mountain photography. This particular example is taken just after sunrise, after a trek in the pitch-black to reach his location. Notice the sunlight must be behind him in this example, shining the first golden rays on to the cliff tops:

And another below from Jeff, using the shadows and slither of light to add interest to the scene:
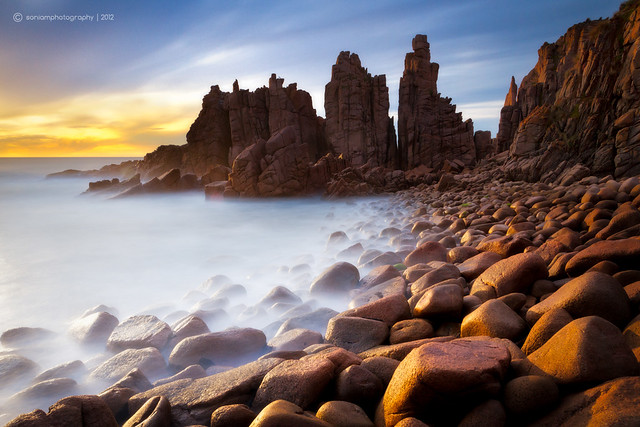
 This next shot is from Sonia M. Look at the photo, you can clearly see the golden light shining on the foreground rocks and the background “pinnacle”. The sunlight is coming from the left of the image, I’d guess probably at a 90 degree angle to where the camera is pointing:
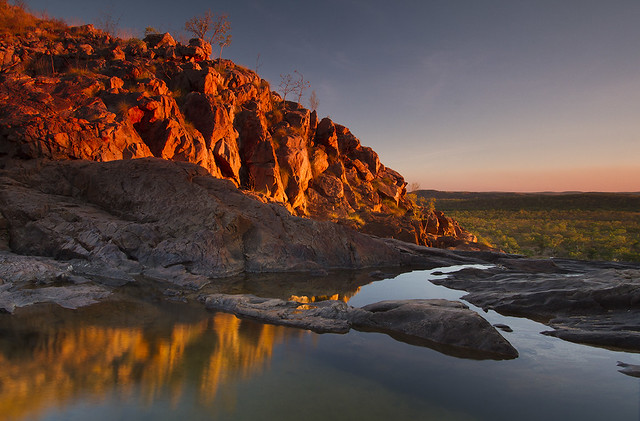
The below shot is a location a few of you visitors to the Northern Territory might recognise! This shot is from a fellow Darwin photographer, Willoughby Owen – who took the climb up to the top of Gunlom’s waterfalls in Kakadu. The climb is worth it – for the infinite views over the remote bushland and the pristine swimming pools you are greeted with at the top. The below photo was taken just before sunset – see how the rocks are illuminated red in the last glow of the day’s light (and then it’s time for the climb down in the dark!):
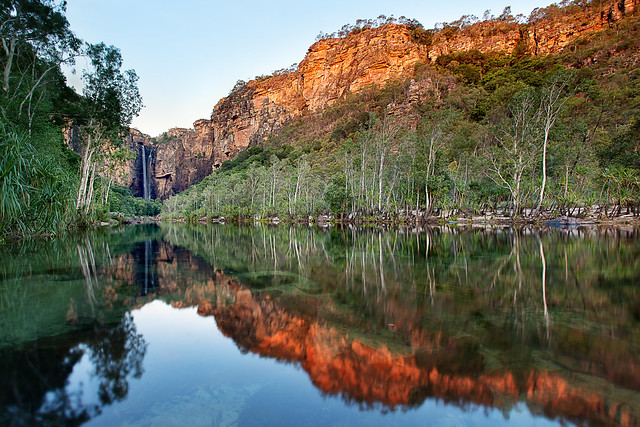
 Here’s one of my own shots you might have seen before – this is Jim Jim Falls (and the gorgeous gorge leading to the falls!). Taken just before sunset, during May 2013.
 From Kevin McNeal:
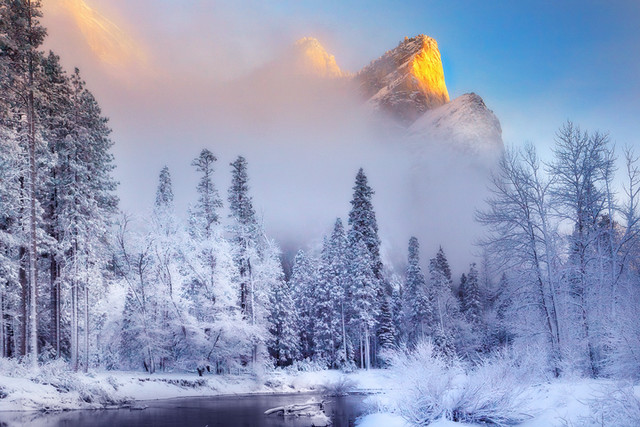
Hopefully the above examples demonstrate some of the ways you should look to use the light in your photographs of landscapes.
Of course, this is just one way to use the light and there are always, always exceptions to the rule! Here are some examples of how you can use the light by pointing your camera at it, instead of away from it:
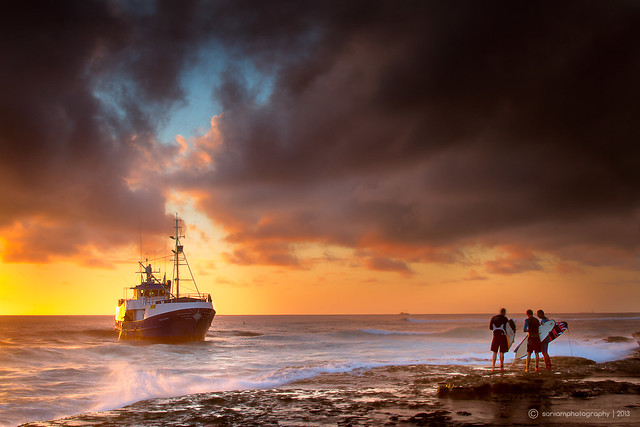
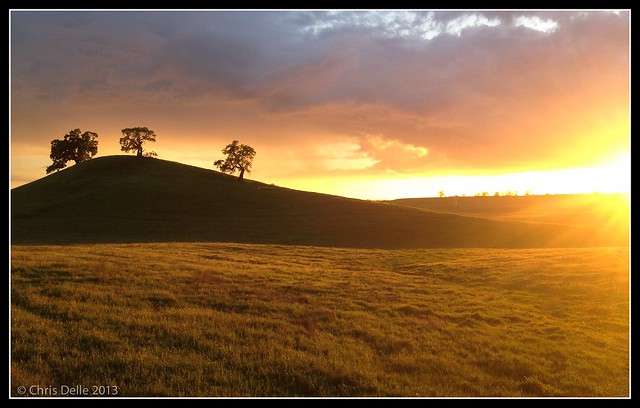 Above: even though the sun is out of the image (only just!), the camera is still pointed in that general direction. Notice how Chris has used this angle which creates gorgeous golden light on the grassy foreground, providing a stunning backdrop and causing the shape of the hills and trees to be perfect silhouettes.
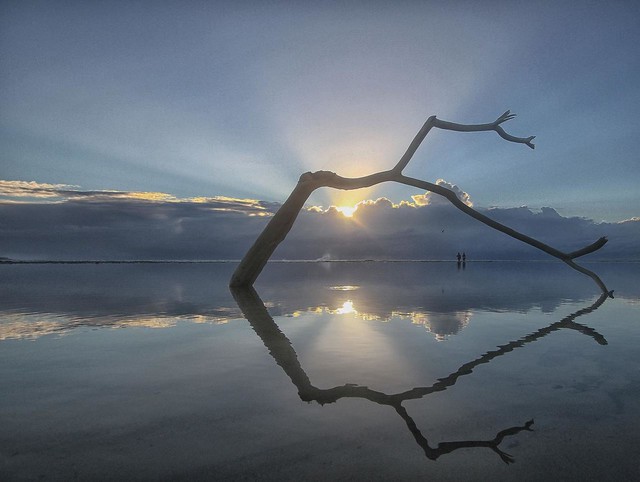
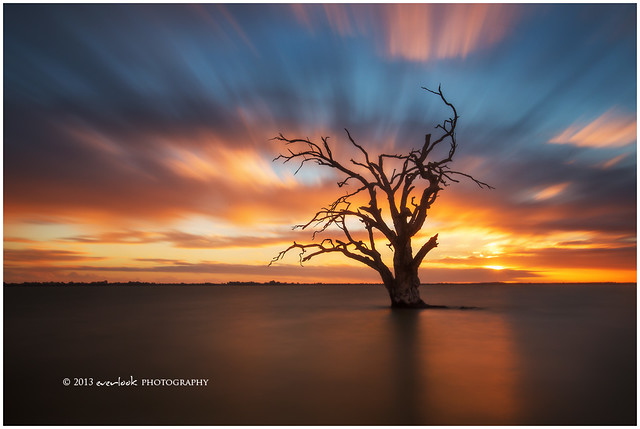 In the above example by Dylan Toh, the sun is hidden mostly by a cloud, even though hidden by a cloud the backlighting from the sun is still strong. Silhouetted shapes make great subjects to these strongly backlit skies.
So far, all of the above examples have been using “golden hour” – that is the first hour of light in the day, or the last hour of light in the day:
- The light is at it’s warmest, it’s reddest.
- The shadows are longer and create more “3-dimensionality” and more shape.
- The light is at it’s softest (reducing blown highlights and too-dark shadows)
Here are some other awesome examples of photography – notice that all of them display something from using the light, compositionally. See if you can see how the light (or shadows) have enhanced the photo:
From SK Westmore:

From Peter Spencer
Pranabesh Das:

Another from Sonia M Photography
 Golden hour is important – as you can see from all of the above examples.
BUT! Don’t think you can’t possibly take photos at any other time. There are other ways to use the light. Other awesome conditions our weather can create. Check out these following examples – all still using light in the photographs, but not that typical “golden hour” light.
Storms provide some AWESOME lighting. Some clouds are what you want, for dramatic lighting on the landscape.
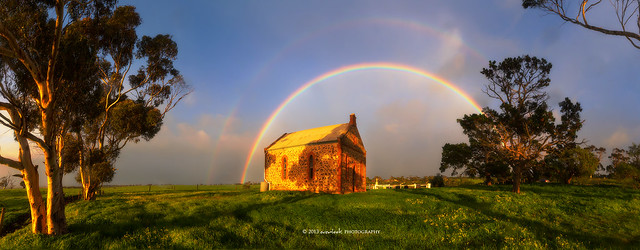
Here’s another one from Dylan Toh – this looks like those first bursting rays from after a passing, dark storm:
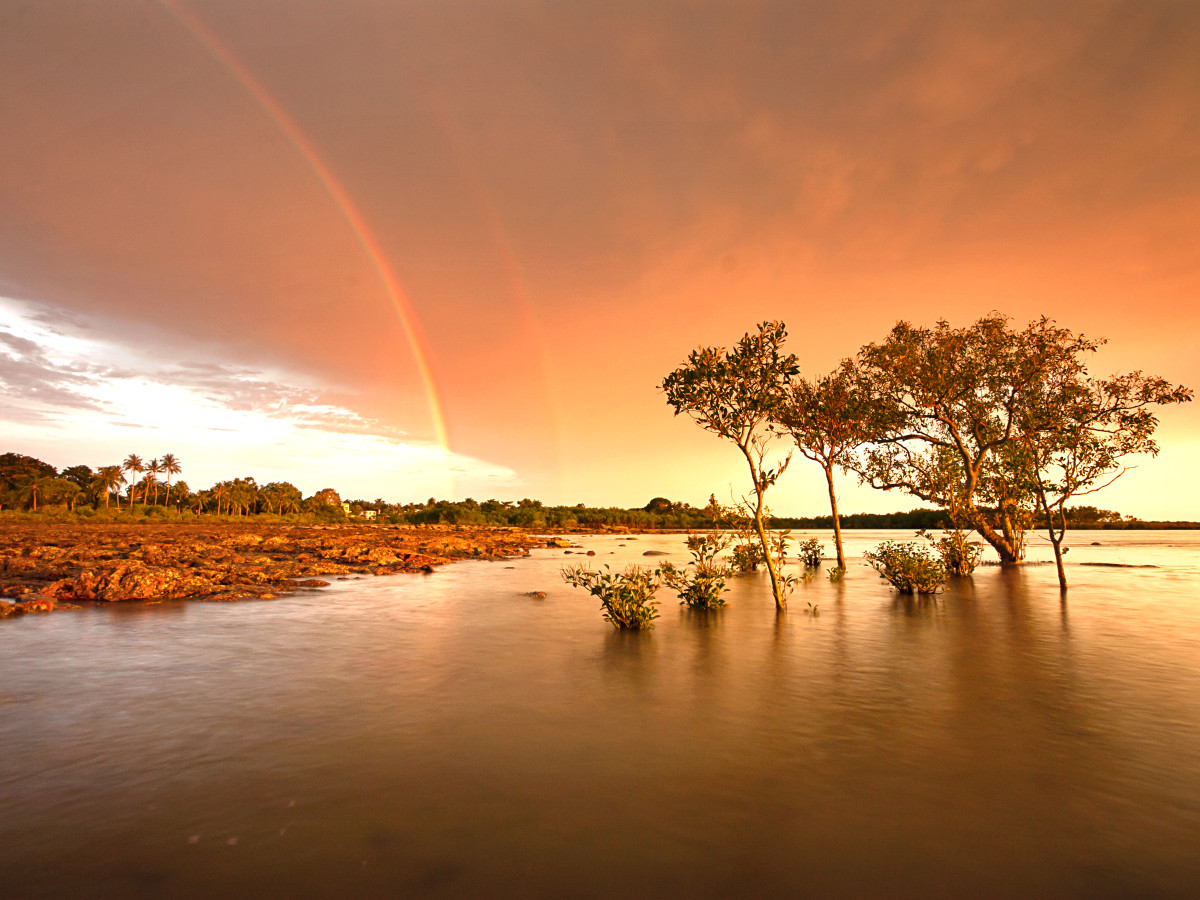
Here’s another one you Darwin visitors might recognise!
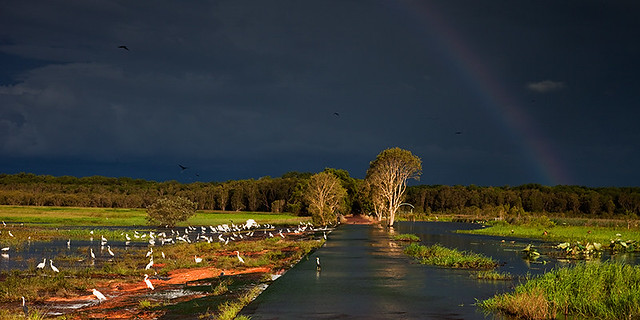
The above photo is from local landscape photographer Nolan Caldwell. This is Fogg Dam in the wet season – most tourist visitors to Fogg Dam would have driven along this wall! Note the dark sky in the backdrop – waiting for that glimpse of sun from behind a cloud, especially after a storm can really provide drama to your photos.
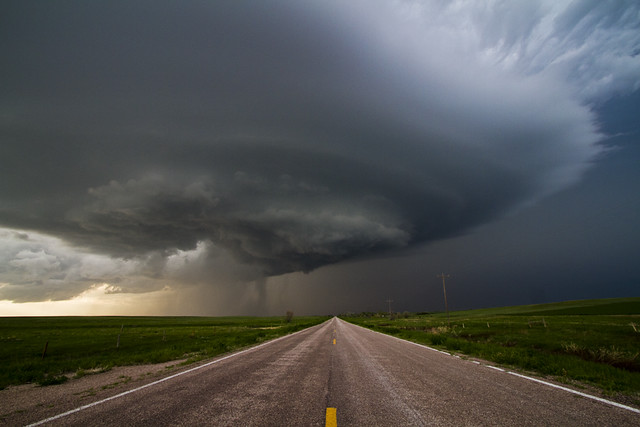
Below: another one from Willoughby Owen – this one is not about that after-storm glow, but more about the transition of light – we can see the stark contrast between the normal daylight against the blackness of that storm cell!
Using the sun behind a cloud to create cool flare effects, from John Valentine:
Night photography gives a whole different kind of light!
Another one from Jeff Lewis, using the MOON light!
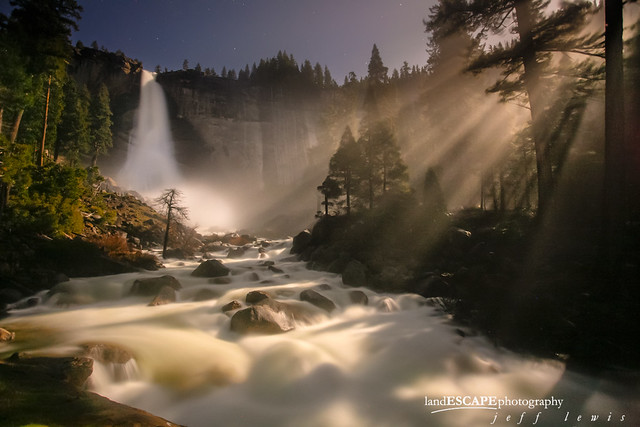
Light “painting” can be used at night to light your subject (with a torch):
Hopefully these examples highlight (no pun intended!) how to use the light in your photos. Hopefully you can now slowly see the light when you are out and about, know what to look for – try to create interest with it. Use light in an obvious way in your photo. Make it a compositional feature!
It’s easier said than done, and obviously the light doesn’t always play the game (hence why landscape photographers travel backwards and revisit the same places over and over)…. You just have to be prepared to get that shot in a quick time frame. Learn how to compose the shot so that when that perfect light does happen – you’ll be ready!
Let me know what you think by posting a comment below!