
What is a long exposure?
Basically, a long exposure refers to the length of the shutter speed used to take a photo.
There is no “typical” shutter speed, but in daylight, on automatic settings a small camera might use 1/250th of a second, or maybe even a 1/1000th of a second. As the light starts to fade, or as aperture is narrowed, longer shutter speeds are needed to correctly expose the exposure.
I would consider anything half a second or longer to be a “long exposure”. This is definitely too long to hand hold!
The shutter could be open for half a second, or ten seconds, thirty seconds or even four hundred and thirty seconds, if you wanted to!
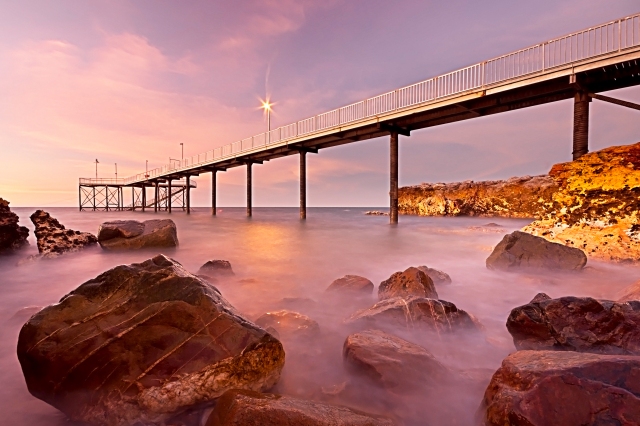
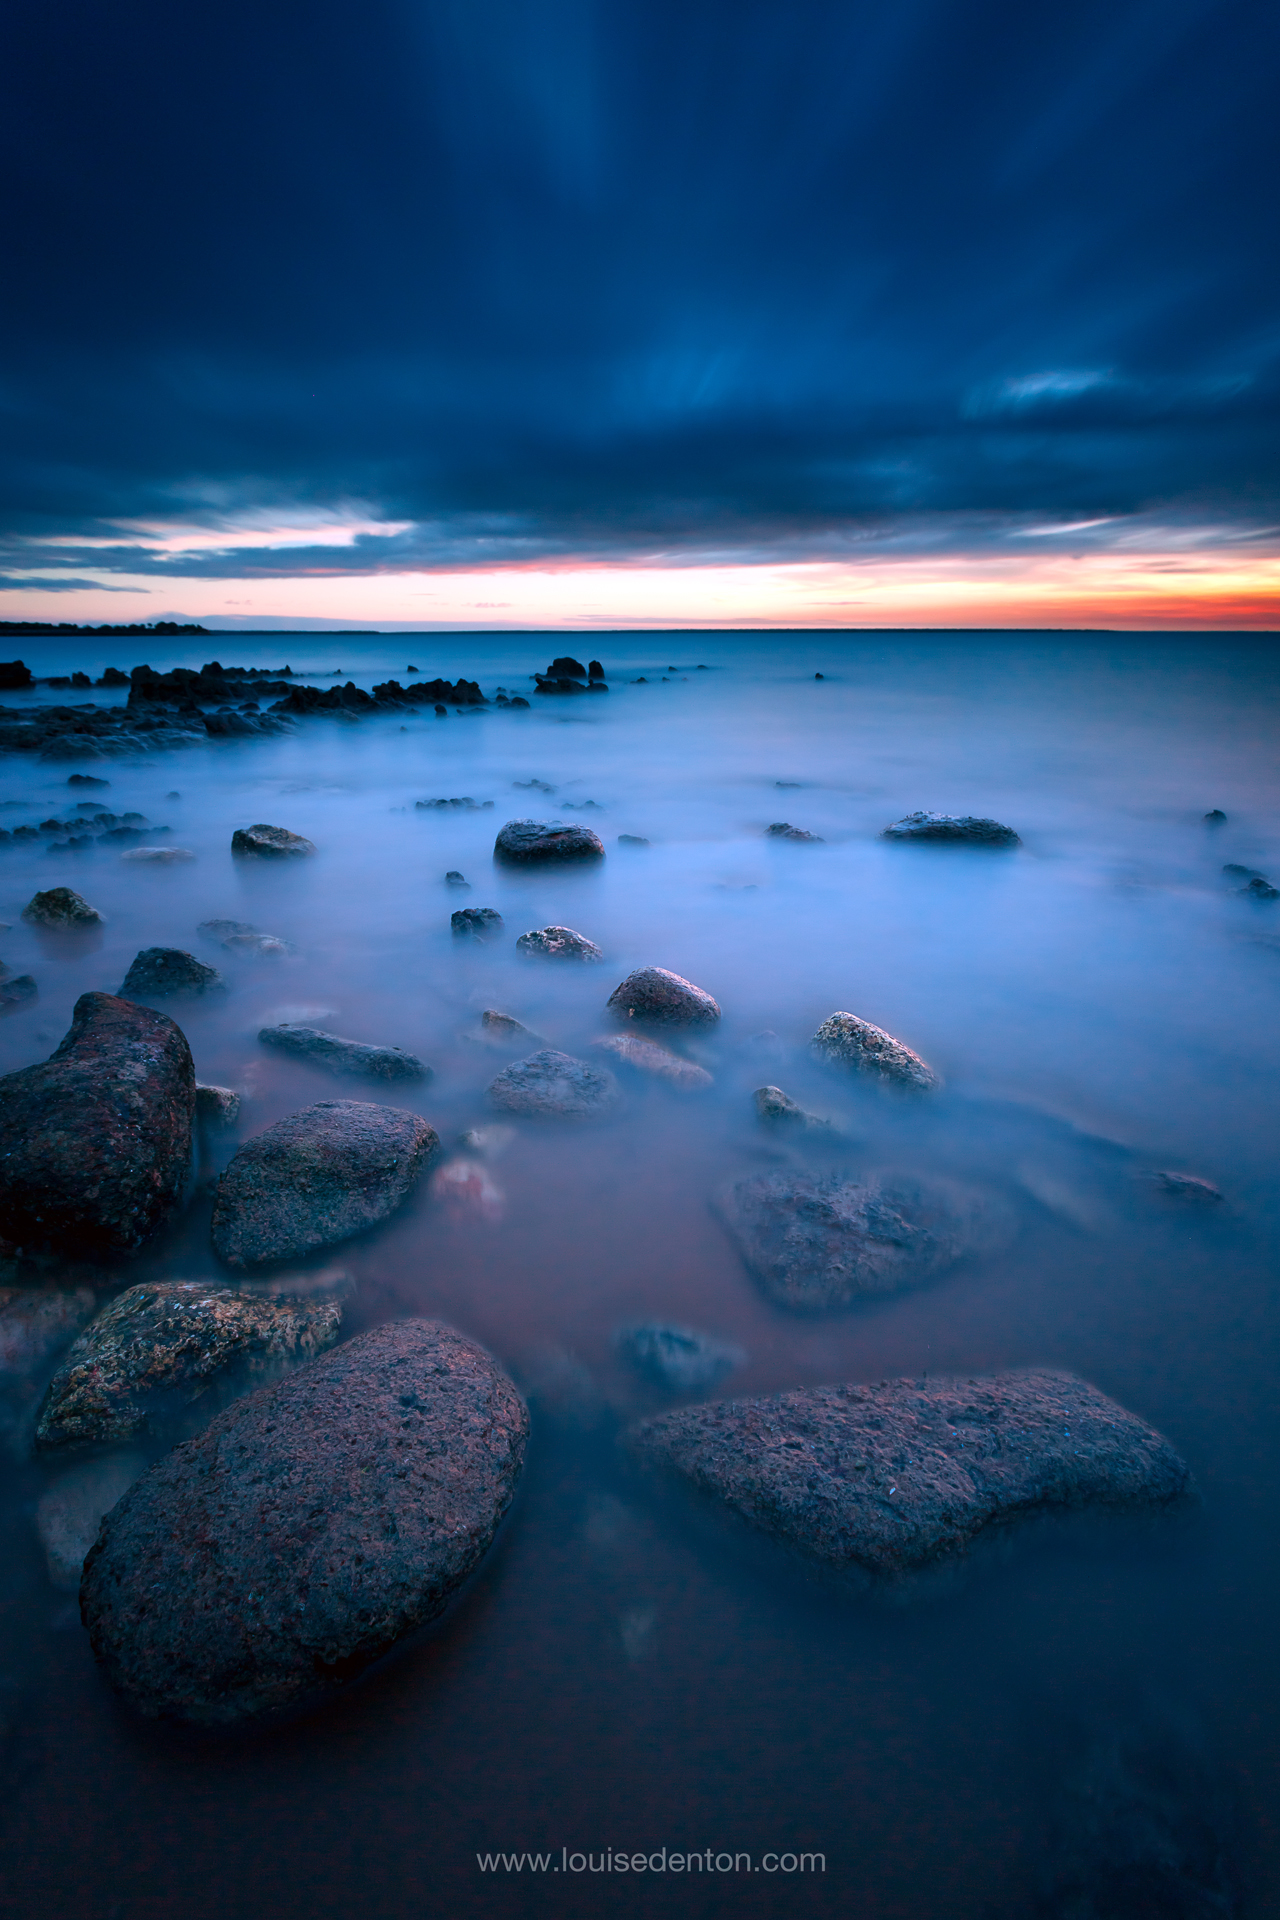
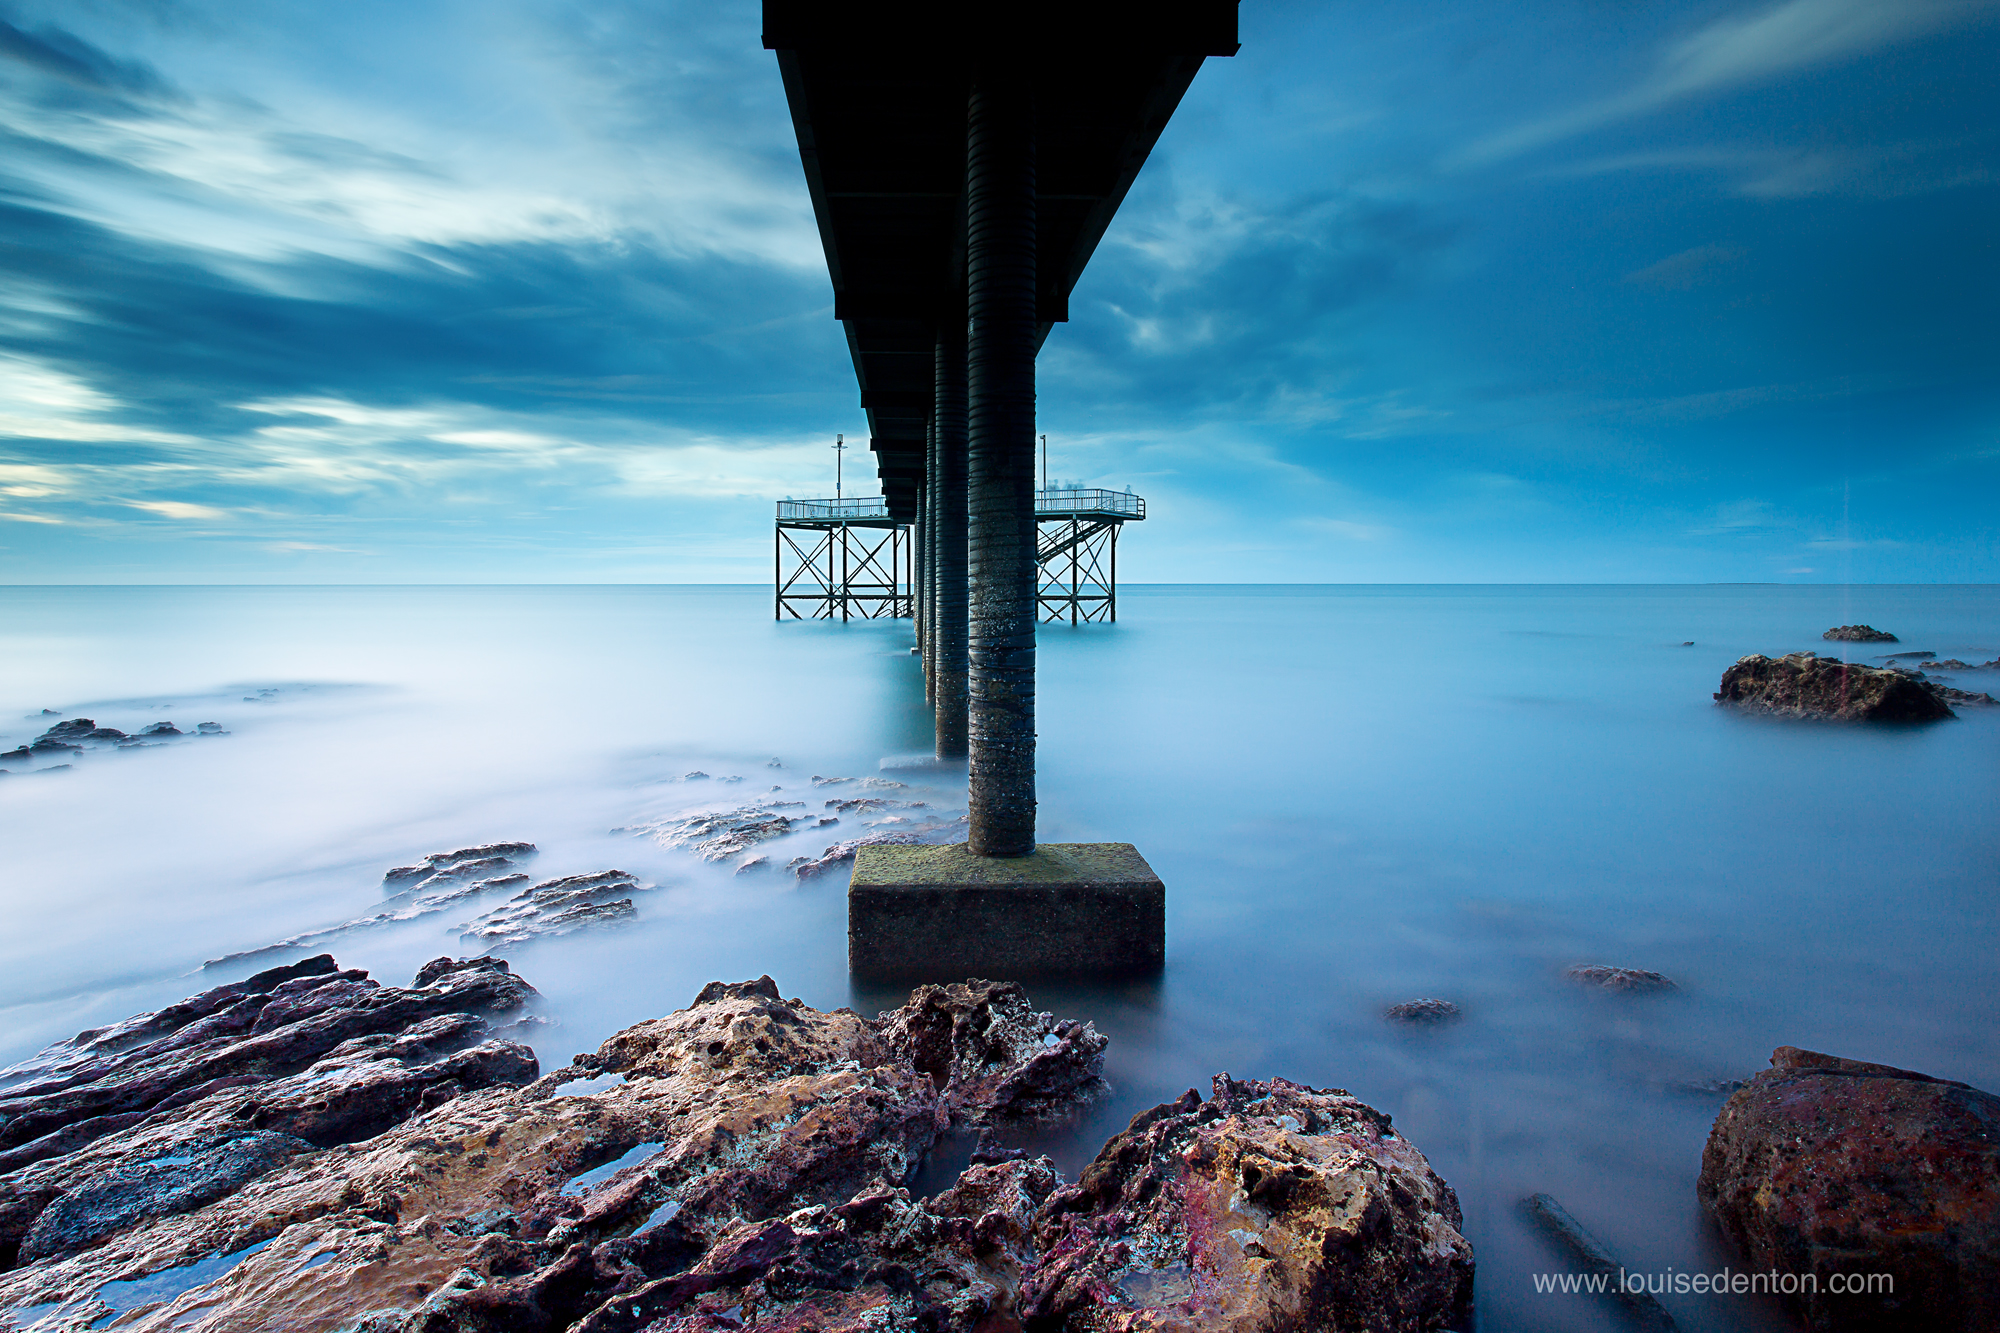
30 Second exposure, blurring the water around the rocks
Why should I use long exposures?
I LOVE long exposures. 95% of my sunset and seascape photos are taken using exposures of half a second or greater. There are lots of benefits to increasing the shutter speed.
Sometimes longer exposures are a necessity, as light gets lower the camera needs a longer shutter speed to create the correct “lightness” (exposure) within the photo.
Depending upon light, and tidal condition, I tend to use between a quarter of a second or one second to create images showing the movement of the water. The water blurs together to create interesting lines and patterns.
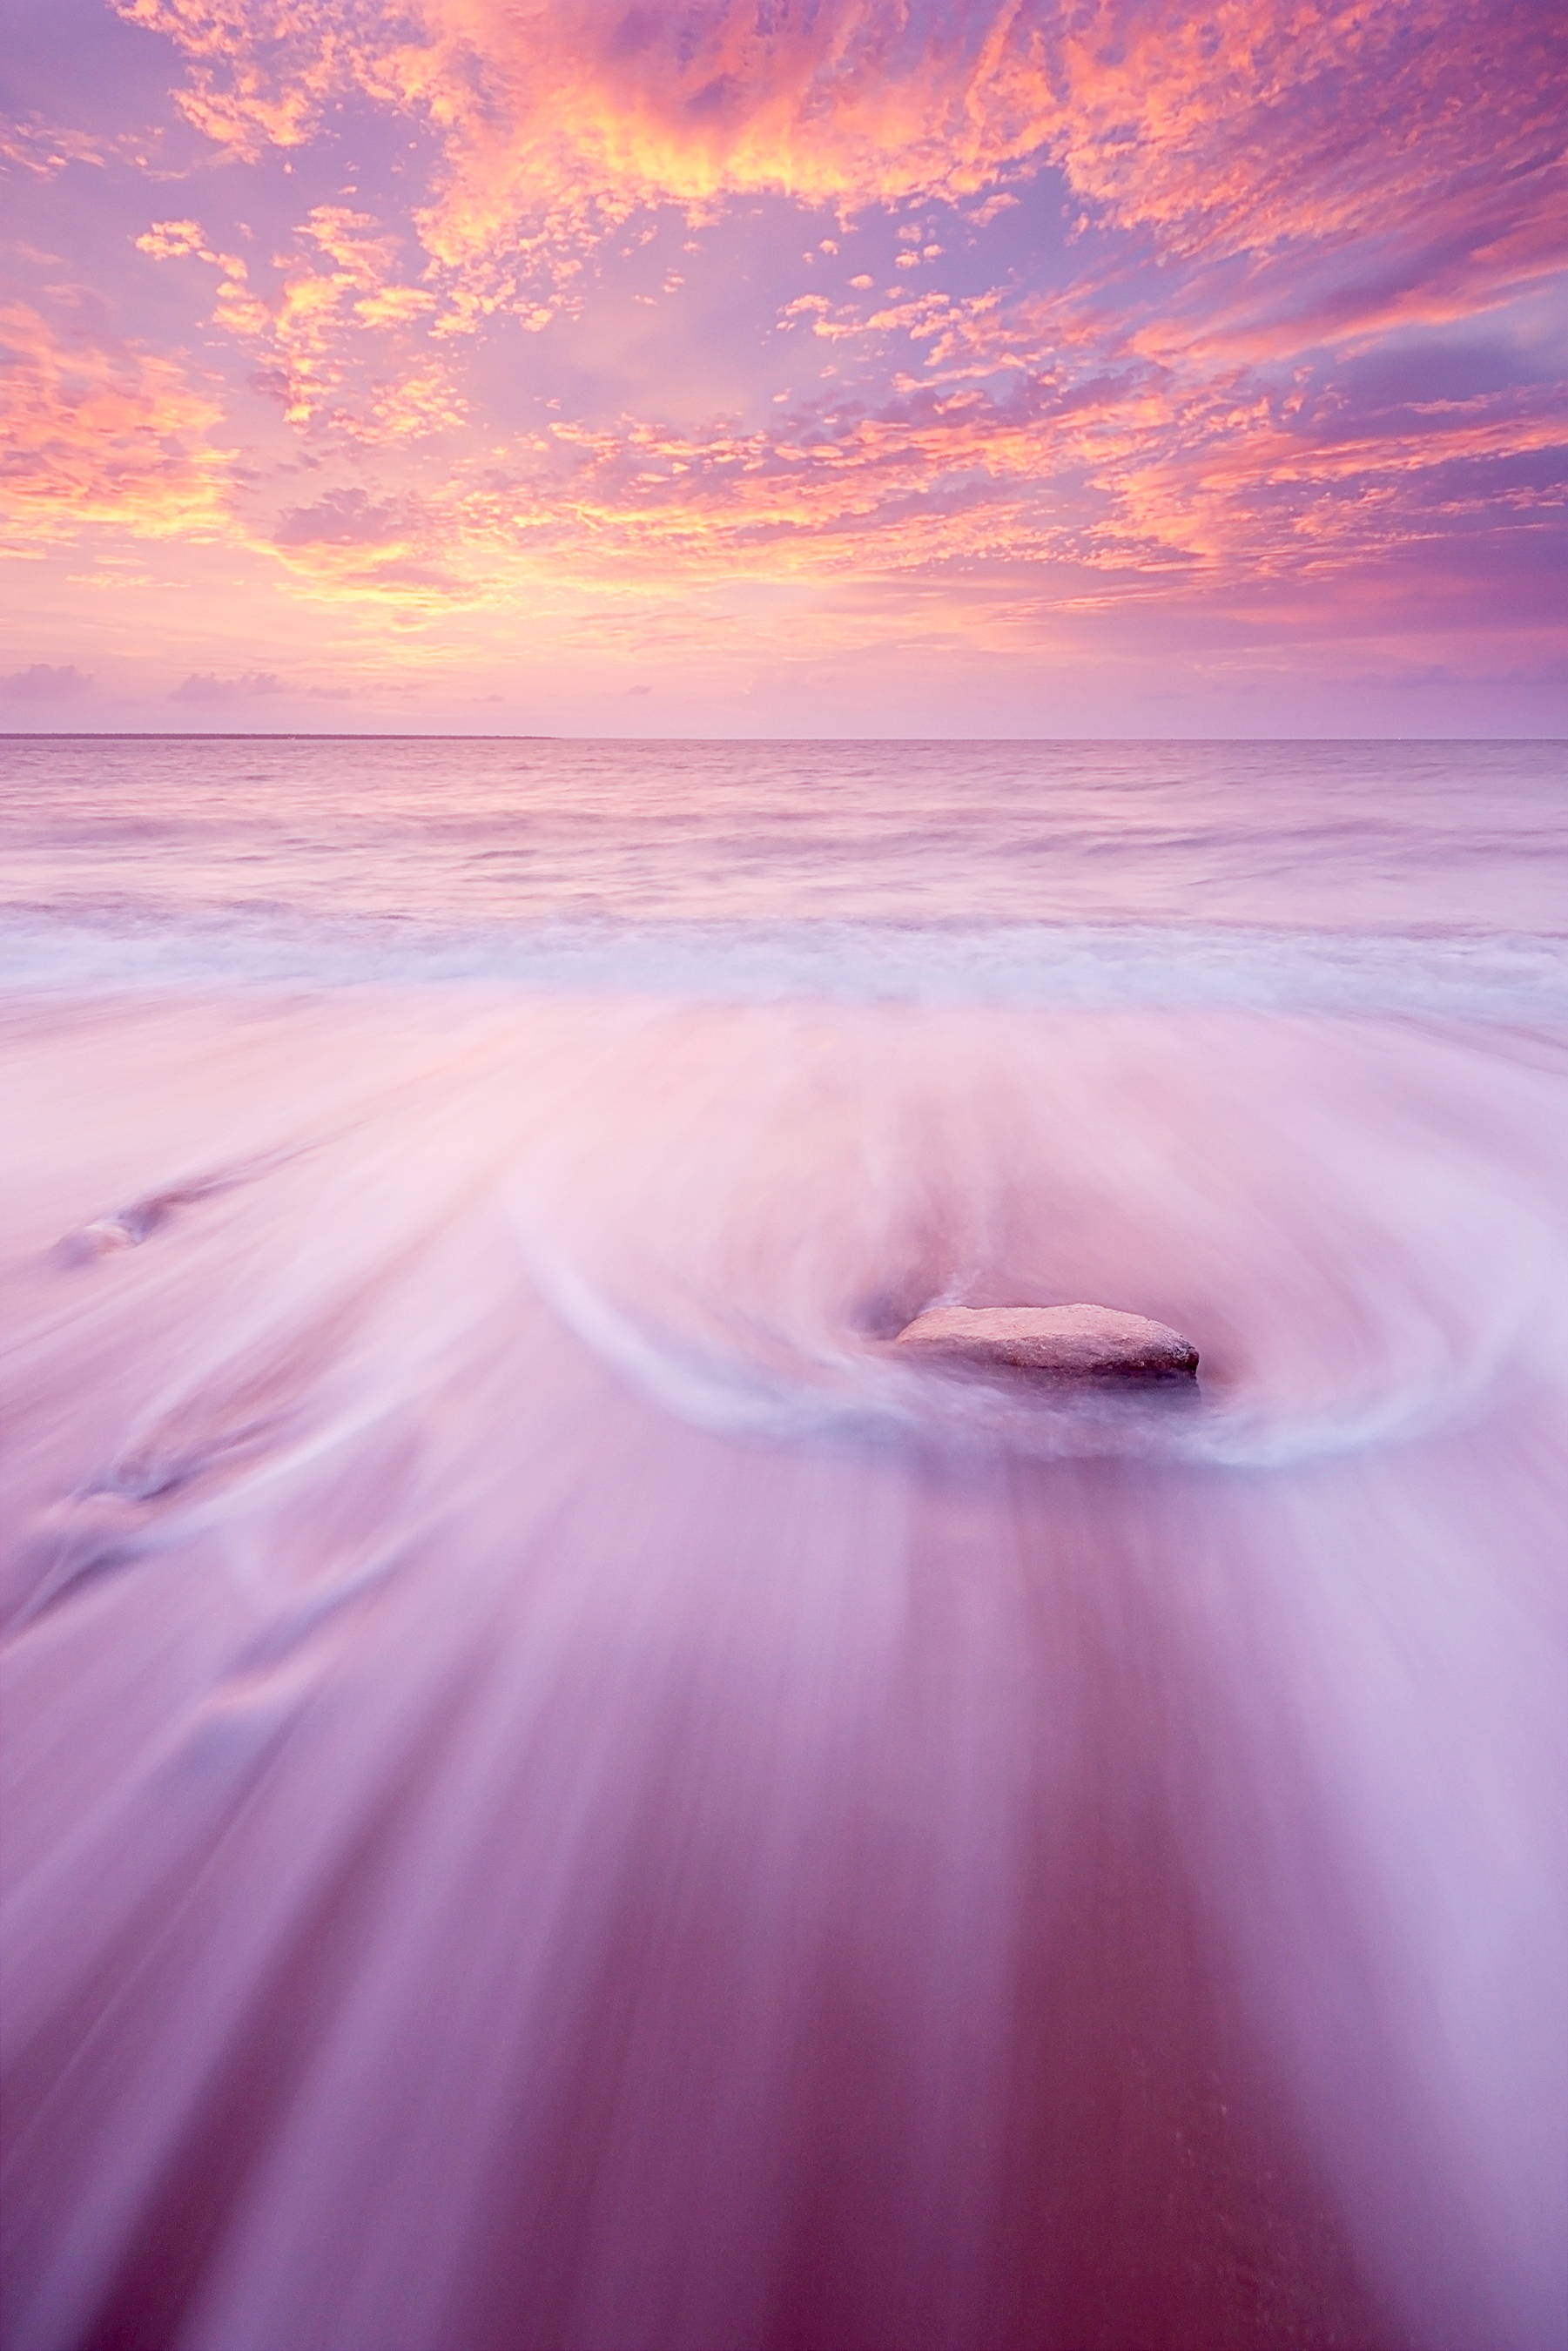
Wave receding back in to the ocean, using a 0.8 second exposure (F13, ISO100)
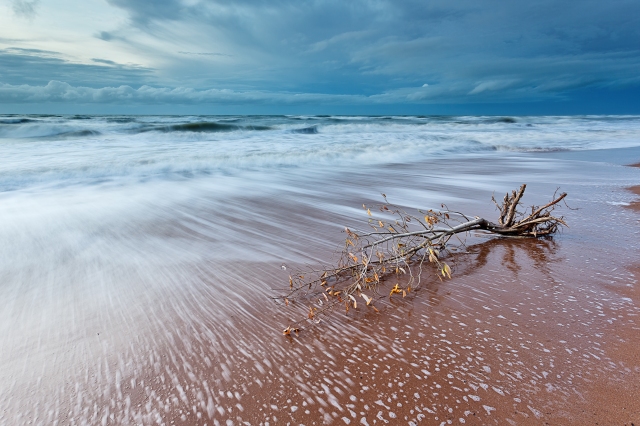
Water moving around the rocks of Fannie Bay – a one second shutter speed
As shutter speeds get longer, water tends to smooth out more. In Darwin, I generally use around fifteen seconds or longer to smooth the water – all the water movement blurs together in to one flat surface.
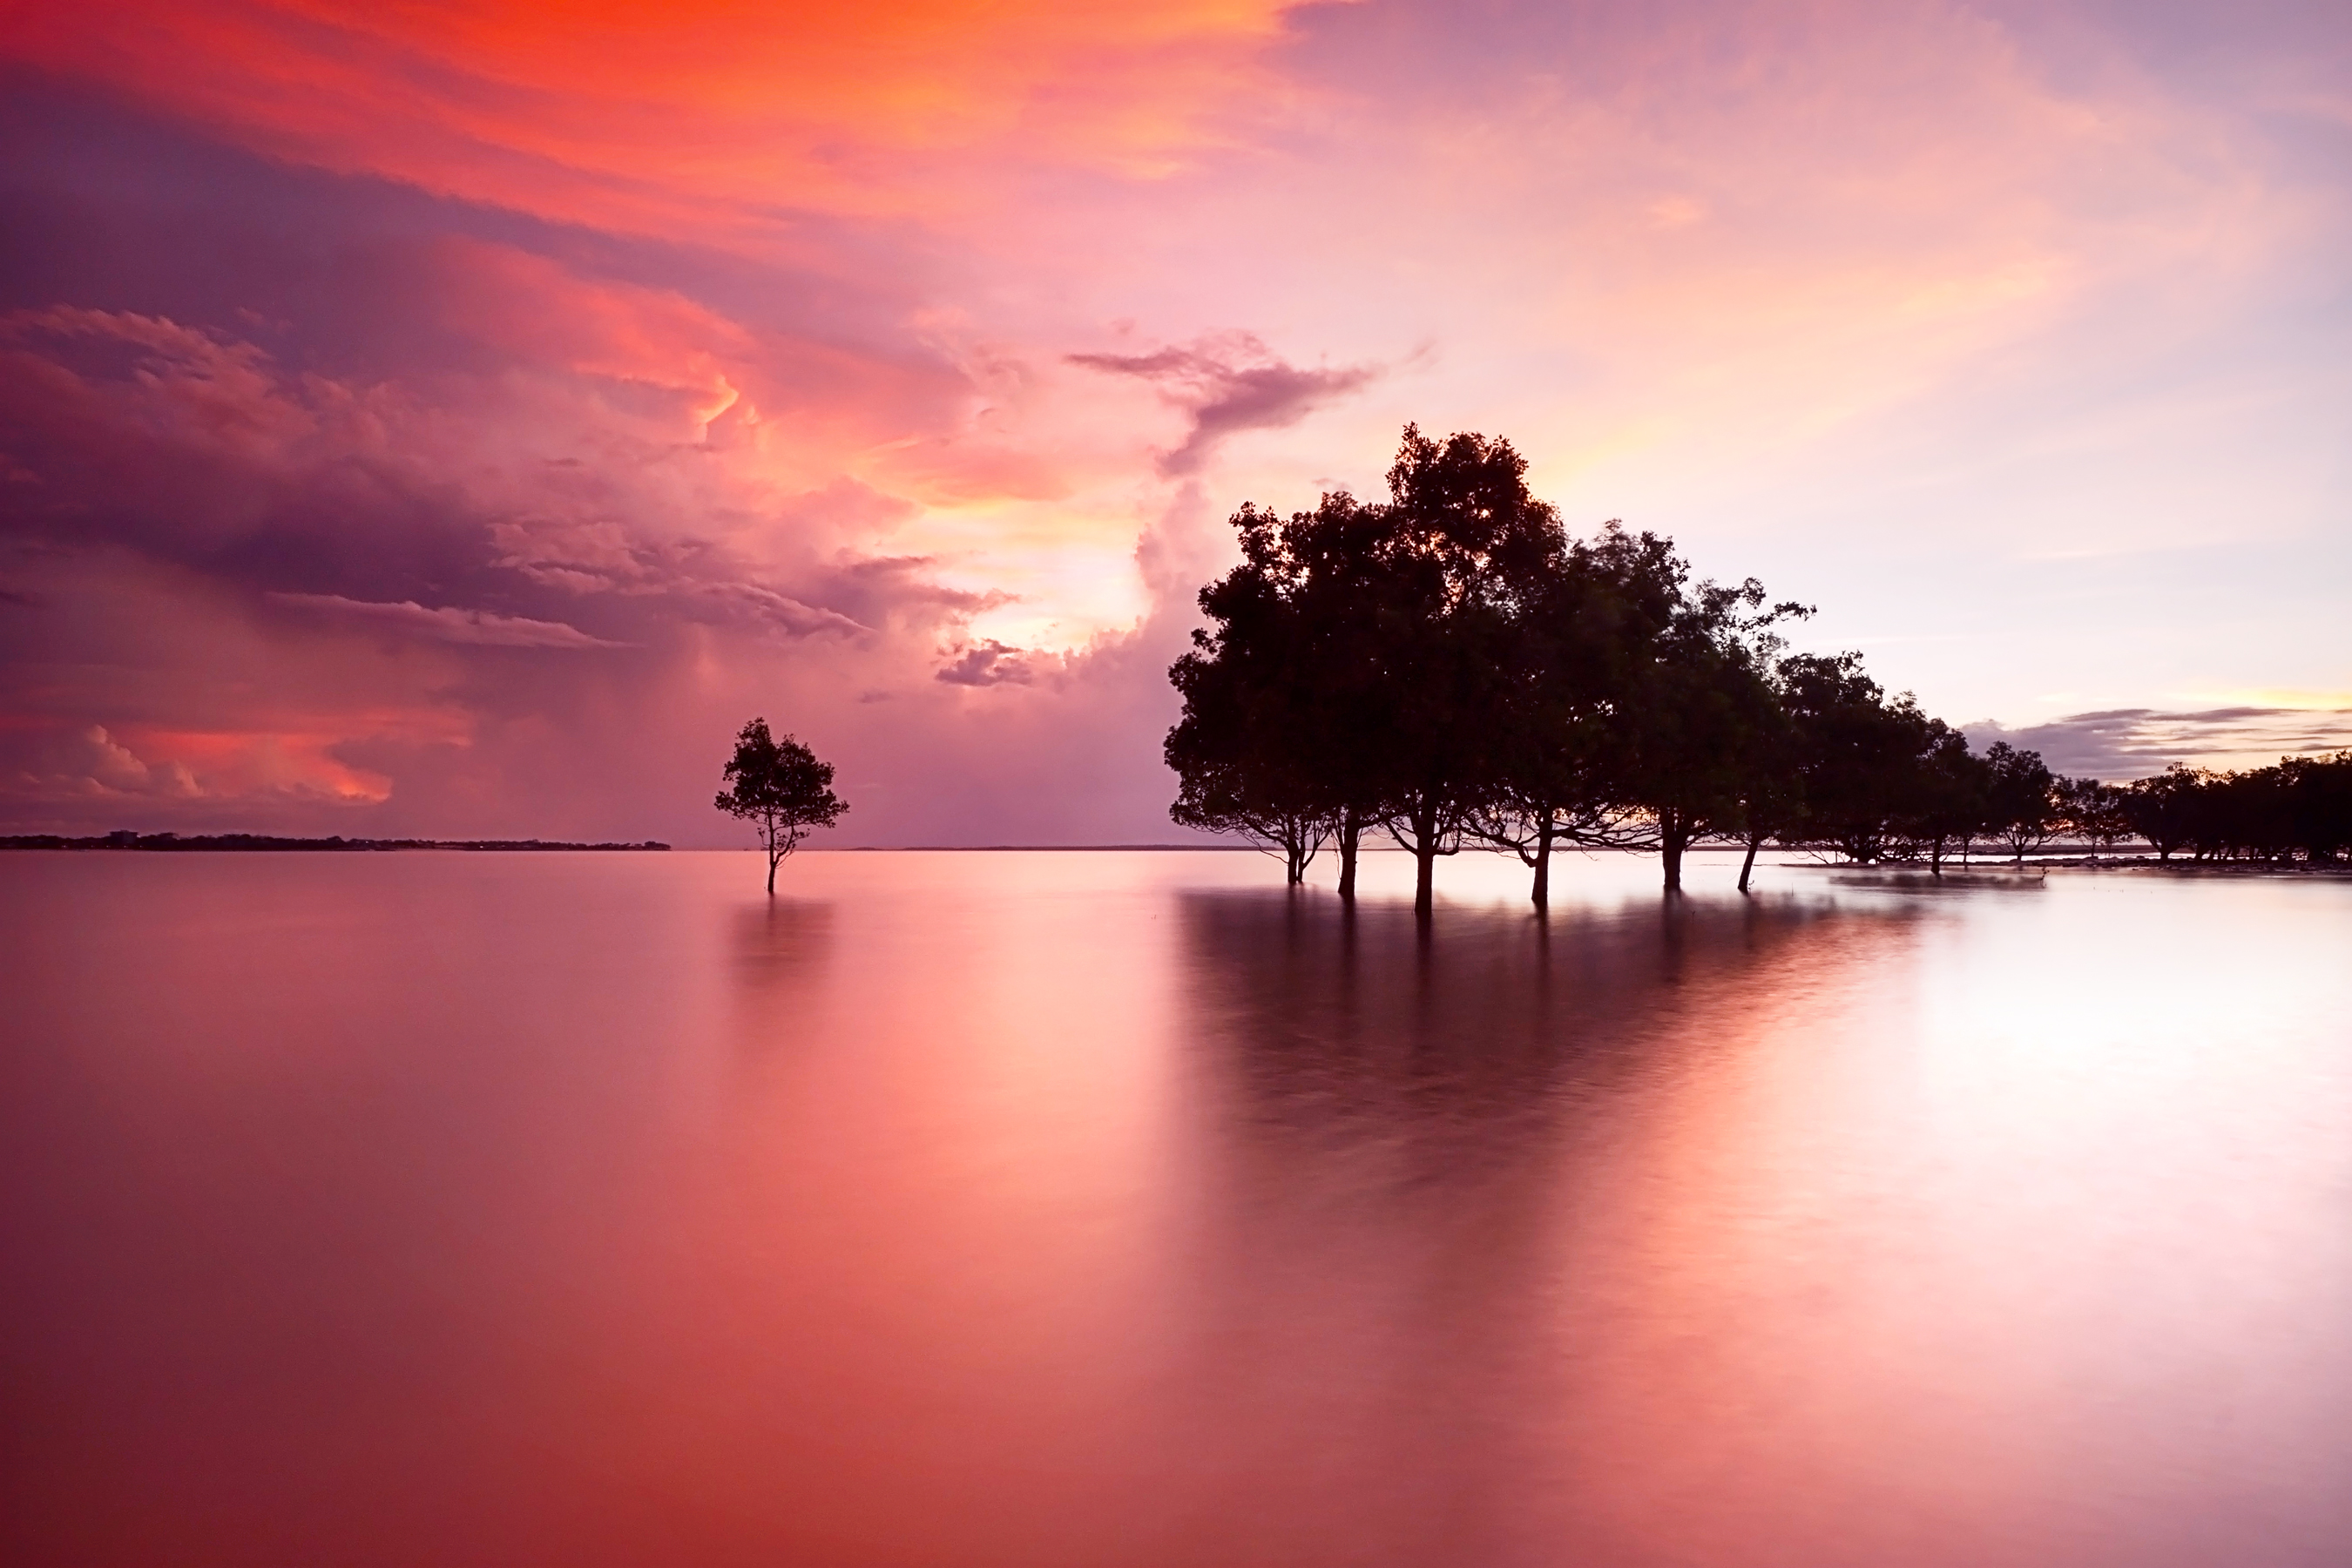
30 second exposure, smoothing out the water
Images using longer exposures tend to get sharper – the camera captures more detail.
Longer shutter speeds can also result in more vibrant colour.
Depending on wind conditions, long exposures show movement in the clouds creating patterns in the sky of the photos.
There are lots of uses for long exposure photography. I use it mainly for landscapes and seascapes, but it can be applied to a variety of subjects.
Below are some examples from Flickr.com:
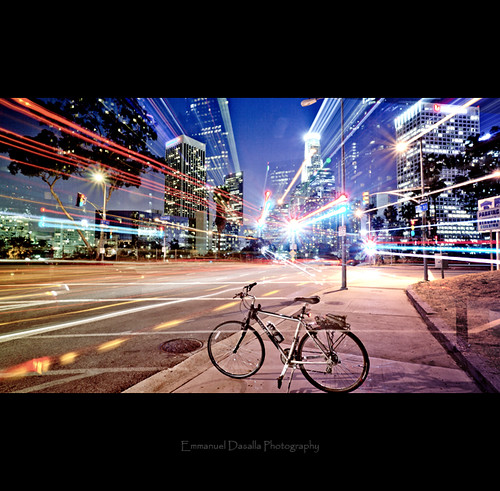
Traffic travelling at night, from Emmanuel_D Photography, 121 second exposure
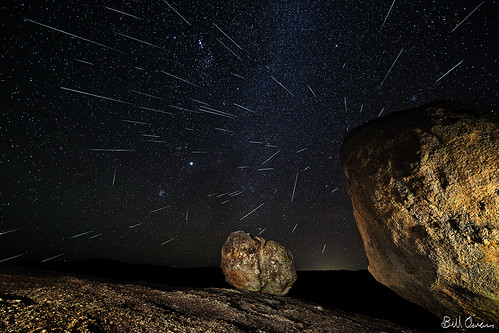
Stars and meteor shower in Queensland, by Bill Owens
Light painting, by John White Photos

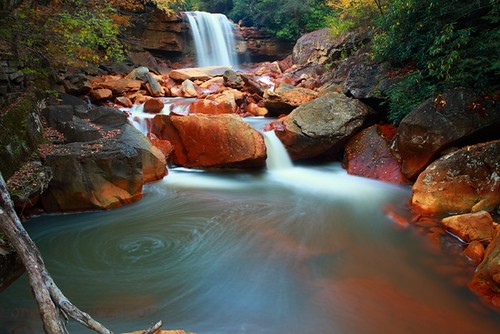
Waterfall long exposure by ForestWonder.com
There are so many more long exposure examples that I want to share from Flickr! Check out more in my “favourites” folder on Flickr.
What do you need for long exposures?
- A DSLR.
Some compact cameras can be used manually, and you can use long exposures, sometimes up to 30 seconds. Generally speaking, they are capped at a maximum shutter length (and in set increments). DSLRs allow much more flexibility and much longer exposures. A DSLR camera will also allow you to activate the “mirror lock up” setting, improving sharpness in images.
- A tripod.
The camera must not move! A tripod is essential, and it must be sturdy too. On the beach, this can mean burying the legs and feet deeper in to the sand to ensure it doesn’t move with the water.
If you don’t have a tripod, you can use a fence post or something else stationary and steady!
- A remote shutter release.
This is not essential, but very useful. The remote will enable you to take the photo using the remote, instead of the shutter button on the camera. Why? Long exposures require complete stillness of the camera, and often pressing the shutter will cause the camera to wobble slightly – causing blur in the photo. Using the remote means you don’t touch the camera, which means sharp photos!
A remote shutter release is also very useful for exposures taken using “bulb” mode. Holding your finger down on the button for 30 seconds, or 360 seconds can be annoying – the remote I use, operates on “bulb” mode by pressing the remote once to start the photo, and once to end the photo.
If you don’t have a remote shutter, you can also use the two-second-timer setting on your camera. The shutter is depressed, and the camera waits for two seconds before taking the photo. This gives the camera chance to steady itself and prevent camera shake and motion blur from touching the shutter.
- ND filter (optional)
To create long exposures in brighter, daylight conditions an ND filter can be used to make the scene darker (therefore requiring a longer exposure to correctly expose the photo). A Neutral Density filter (ND) is a grey filter attached to the front of the lens. They vary in darkness, dependant upon how many stops of light they block. The darkest used is often the 10 stop ND filter, but they also are available in 1 stop, 3 stop, 9 stop, etc. A 10 stop ND filter can capture daylight scenes at thirty seconds.
184 second exposure taken just after sunset with a 10 stop ND filter
450 second exposure after sunset, f13, ISO100
How do I take long exposures?
I usually use Aperture Priority mode for my landscapes. I generally use between f11 and f16 for my landscape photos. My photos are generally taken between 10 and 20 minutes after the sunset, and using Aperture Priority mode will calculate your shutter time for you (either Av or A on your camera dial). Shooting this long after sunset, with the settings above and ISO 100 will result in longer exposures calculated by your camera.
Using dark ND filters will generally require you to use your camera manually. Sometimes Shutter Priority mode can be used, but personally I prefer to have a control on my aperture instead of shutter speed.
One of the most important set up points with using long exposures is the steadiness of the camera. The tripod must be sturdy, and avoid touching the camera to take the photo.
Sometimes, the environment can get too dark for Aperture mode to calculate your shutter speed for you. Most DSLRs are limited to 30 seconds as a “setting”. If you want longer than 30 seconds, you will need to use “bulb” mode.
Bulb mode
Bulb mode refers to the manual mode on your camera that enables you to choose the length of your shutter speed. You will also need to set your aperture and ISO manually.
How do you know how long to do your shutter speed?
There is an easy way to work it out (other than trial and error!)
Compose the scene, set up your camera and use Aperture mode to take a test shot. Set your Aperture to the desired setting (e.g. f11). Now, if it is too dark increase the ISO to 200 or 400 and remember the shutter speed it set.
Now flick to bulb mode, use the same aperture (e.g. f11) and reduce the ISO back to 100. To calculate the shutter speed required, using the recommended shutter speed from your “test” and multiply that by the factor of the ISO.
For example, if in Aperture Priority your settings read f11, ISO 200 and 30 seconds, your bulb settings would be f11, ISO 100 and 60 seconds (shutter speed multiplied by 2 – of ISO 200).
For example, if in Aperture Priority your settings were f14, ISO 800, 15 seconds, your bulb exposure would be f14, ISO 100 and 120 seconds (15 sec shutter speed multiplied by 8 – of ISO800)
I think that’s the basics to get started on long exposures! Feel free to ask any questions below, or via my Facebook page.