
A few of you who follow me on Facebook or Flickr will see I’ve had a couple of recent attempts at taking photos of the stars. This was all sparked by me hearing about the Perseid Meteor Shower.
I’ve never heard of it before this year – it is an annual shower, that provides regular and spectacular meteors for us viewing down here on Earth. Every year it peaks around the 11th of August, and I decided to try and catch my own meteor on camera.
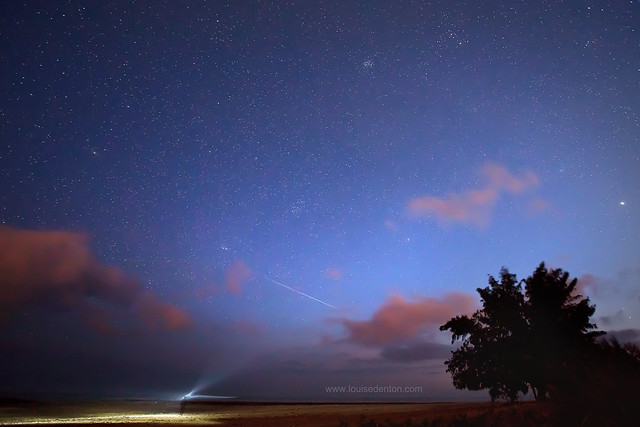
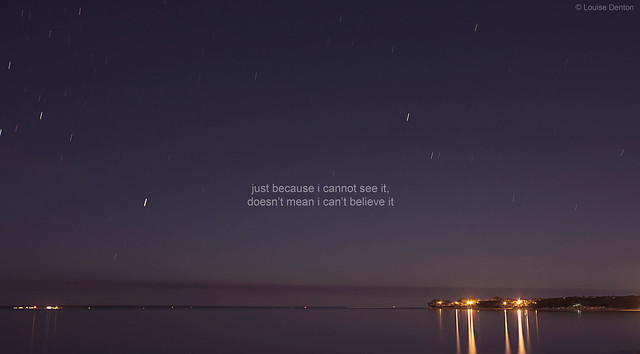
I had a couple of attempts at meteor photography and despite seeing a few meteors (some very bright and special!), I only managed to capture one on camera:
So I have decided to try and perfect my star photography so that I am ready to try meteors again next year!
The above photo was taken at Lee Point Beach. The light in the foreground is from a fisherman making his way from the car park (off the right edge of the photo) to the shoreline (on the left).
For those of you who know Darwin, you’ll know this is only around a 15 minute drive from the CBD. I am looking NE, toward an area where there is no light pollution. It took around 20 minutes or so for my eyes to adjust properly to the darkness – we are so lucky in Darwin that we live in an area this remote. It is not hard to get away from light pollution here!
That’s my first tip for night photography – no matter how you are trying to capture the stars – whether it’s the milky way, the meteors or star trails you need to get away from light pollution! This also means shooting when there is no moon. The moon gives off a surprising amount of light, which is not ideal for star photography.
I’ve spent many night’s camping in remote areas – if there’s a full moon, after your eyes have adjusted the moon is that bright you don’t need to use a torch! (Obviously you wouldn’t be able to read a newspaper, but you can make your way around!)
Below are another few attempts of mine – by no means masterpieces, but it is a trial and error process and I am learning!
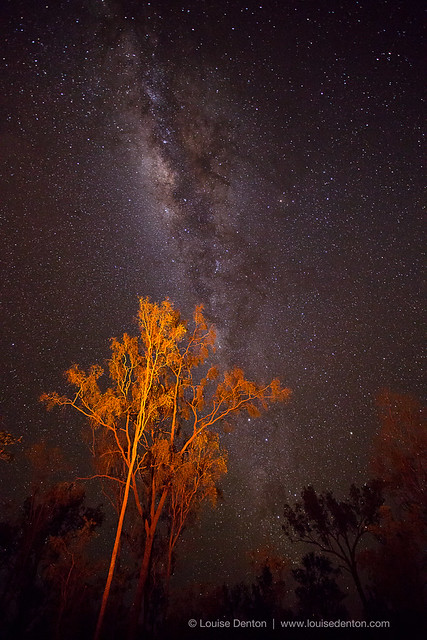 The above shot shows the Milky Way from a remote area of Kakadu National Park. This location is probably around 300km from the nearest town, with no nearby light pollution.
The Northern Territory has some wonderful, isolated places not far from Darwin – you budding photographers here have no excuses if you want to get out and try night photography!
The tree in the above photo is illuminated orange due to the campfire that was lit below.
This brings me to another point about taking photographs of the sky.
1. When taking photos of the sky, it is important to remember composition.
It is easy to be blown away by the beauty of the sky and the vision of the stars. The camera captures suprisingly a lot of detail in the sky! BUT don’t forget composition! “Normal”, day time landscape photography needs a subject – the same applies at night.
In the daytime, would you take a photo directly at the sky and the sky alone? (Remember there are always exceptions to the “rules” but generally, you wouldn’t!). So why do it at night? You still need a focal point. In my two examples above I have used trees – I like trees!
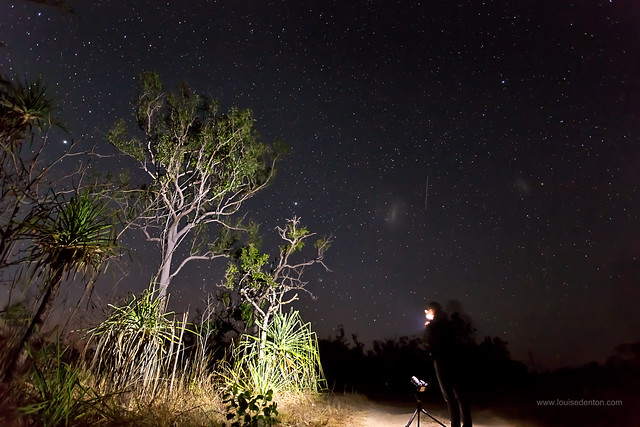
You can use anything – here are some other examples from Flickr. Click on the photo to check out the photographers’ works.
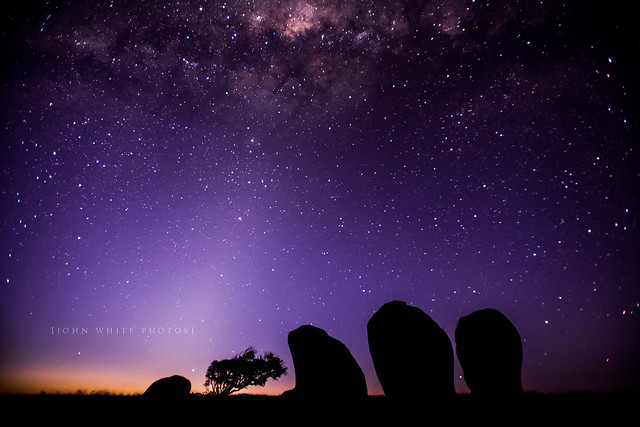
Here the focus point is the rocks:
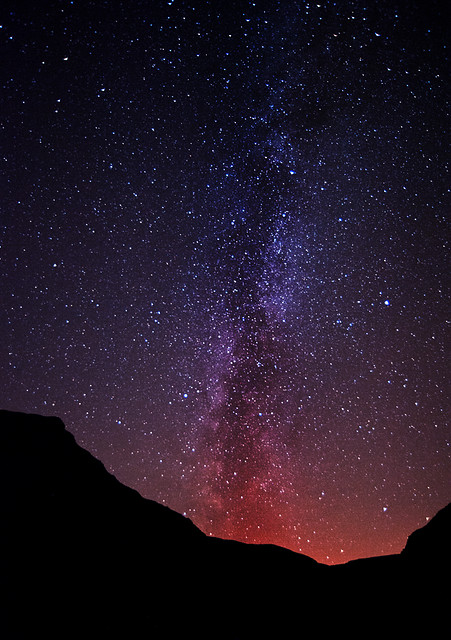
Here it’s the silhouette of the hills:
Here it’s the silhouettes of Murphy’s Haystacks in South Australia:
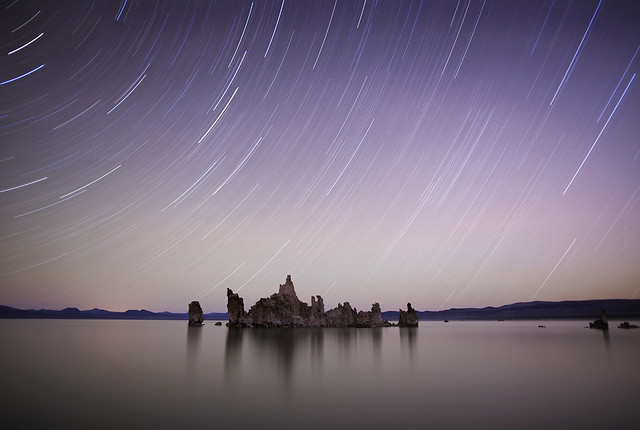
Below the subject is a lighthouse:
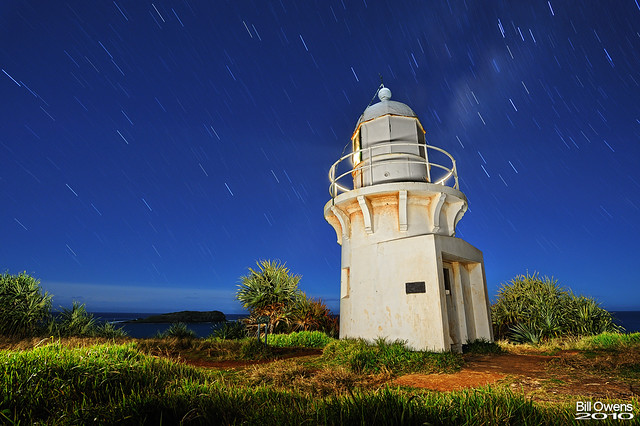
In all of the above examples, you will notice a few differences in how the photos look.
- Sometimes the stars are “normal”, sometimes they appear in lines or streaks.
- Sometimes the focus point, the subject of the photo is dark (a silhouette), sometimes it it well lit.
The second point is “easy”. What ever you decide your subject to be, you can choose whether or not to light it up or not. Some shapes lend themselves perfectly to be silhouettes – sometimes we don’t need to see detail. Interested trees, rock shapes, windmills or lighthouses could all be used as silhouettes.
If you want to keep your subject visible – like the above lighthouse, or the rocks from the first example, you need to light your subject up. You do this using an LED torch – literally shining the light all over your subject.
Here’s a couple of pointers for doing this (although I have only tried this technique a couple of times, so if anyone more experienced has anything further to add, please do so in the comments!)
- Keep moving the torch! If you keep the torch in the one spot for too long, you will end up with over exposed areas in your photograph.
- Light up more than you need to! Shine your light out of the edges of the photograph too – just to ensure you have covered the entire area that you need to.
- Don’t shine your torch for the full length of the exposure. If you are using a 30 second exposure, you will probably only need to shine your torch for 10-15 seconds of that.
This technique is called “light painting”. Literally painting your scene with a torch beam!
 Now, how to create those lines? Or streaks? Like this!
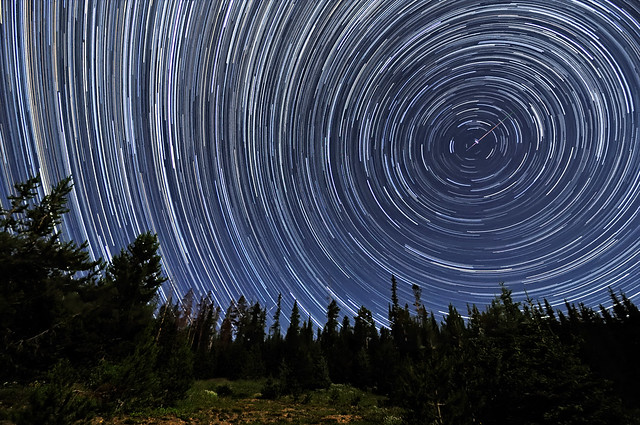
This gets a bit more complex, and I haven’t even attempted this myself yet! But I can give you some basic pointers.
Photos like the above example are many, many photos stacked together. The sky shows the movement of the Earth over a period of hours. Single shots are taken at set intervals, each with the star moved slightly in the sky. These photos are then all stacked together in to one image – the lines are all those singular star photos all joined together.
In the examples in this blog where the stars are still, the longest exposure used should be around 30 seconds or so. Any longer than this and the stars will start to move in your photo. The Lighthouse Photo above used a 600 second exposure – the lines in the photo are how much the stars move in that 600 seconds. Quite a lot! Go back up and have a look 😛
My example below is a 150 second exposure. I was just experimenting here and had a lot of light pollution so you can’t see too many stars:
 But you get the idea.
Camera Settings?
For stationary star photos you should set your camera to manual mode.
Set the aperture (f number) to a small number. Wide open – around f4 or so is ok.
Set the shutter speed to 30 seconds.
Set the ISO to a high ISO – I have been using ISO 3200, but sometimes higher. Take a few test shots to find out the ISO – start it at 3200 or 6400 and see how bright your photo is. If it’s too dark, make the ISO higher until you get a brightness you are happy with.Don’t forget when you are viewing your LCD display at night, it will appear bright (but then you will get your photos to the computer later on and see they are actually quite dark….. CHECK your histogram at the time of the shot.
Remember the higher the ISO the more noise (grain) you will see in your file later.
To get rid of noise, Lightroom and Adobe Camera RAW have some great noise reduction capabilities. Make sure you remove all sharpening too as this will not help with the grain you see.
Hopefully that helps those beginning in night and star photography!
My next aims are:
- To try star trails!
- Get next year’s meteors on camera – well!
Here are some links that might be useful for the above points.
How to take the shots for star trails: http://photoextremist.com/star-trails-tutorial
One technique for processing your shots: http://www.douglasvincent.com/photography/star-trails/post-processing.html
The Perseid Meteor Shower:
Wiki: http://en.wikipedia.org/wiki/Perseids
Earthsky: http://earthsky.org/astronomy-essentials/everything-you-need-to-know-perseid-meteor-shower
Any feedback, thoughts, questions – let me know!