Although I have done a basic work through of my workflow before (that’s a mouthful, isn’t it!), I thought it was time to do another one where I’ve used a fairly new technique: luminosity masks.
For those who already use Photoshop, you would probably already be using layers and masks. However for those who don’t use Photoshop already, it is important to understand a little about layers and masks…. before I delve in to luminosity masks and the walk through of the adjustments I did to this image.
Editing in Photoshop is non destructive; I.e. you never permanently change or edit the base image file. Adjustments are made to the image by piling a series of digital “layers” on top of the base image.
For example, you start with your base layer, the RAW file as it came straight out of the camera. Instead of adjusting the qualities of that RAW file, for example contrast, brightness, saturation, sharpness you would create a separate layer for each of these adjustments. For example one layer with the contrast adjustments, one layer with saturation, a layer with sharpness effects, etc.
These layers, when stacked on top of each other, effect each layer below them.
You can toggle layers on and off easily to see the particular effect that layer has. You can also reduce the opacity of each layer to reduce it’s strength on the final image.
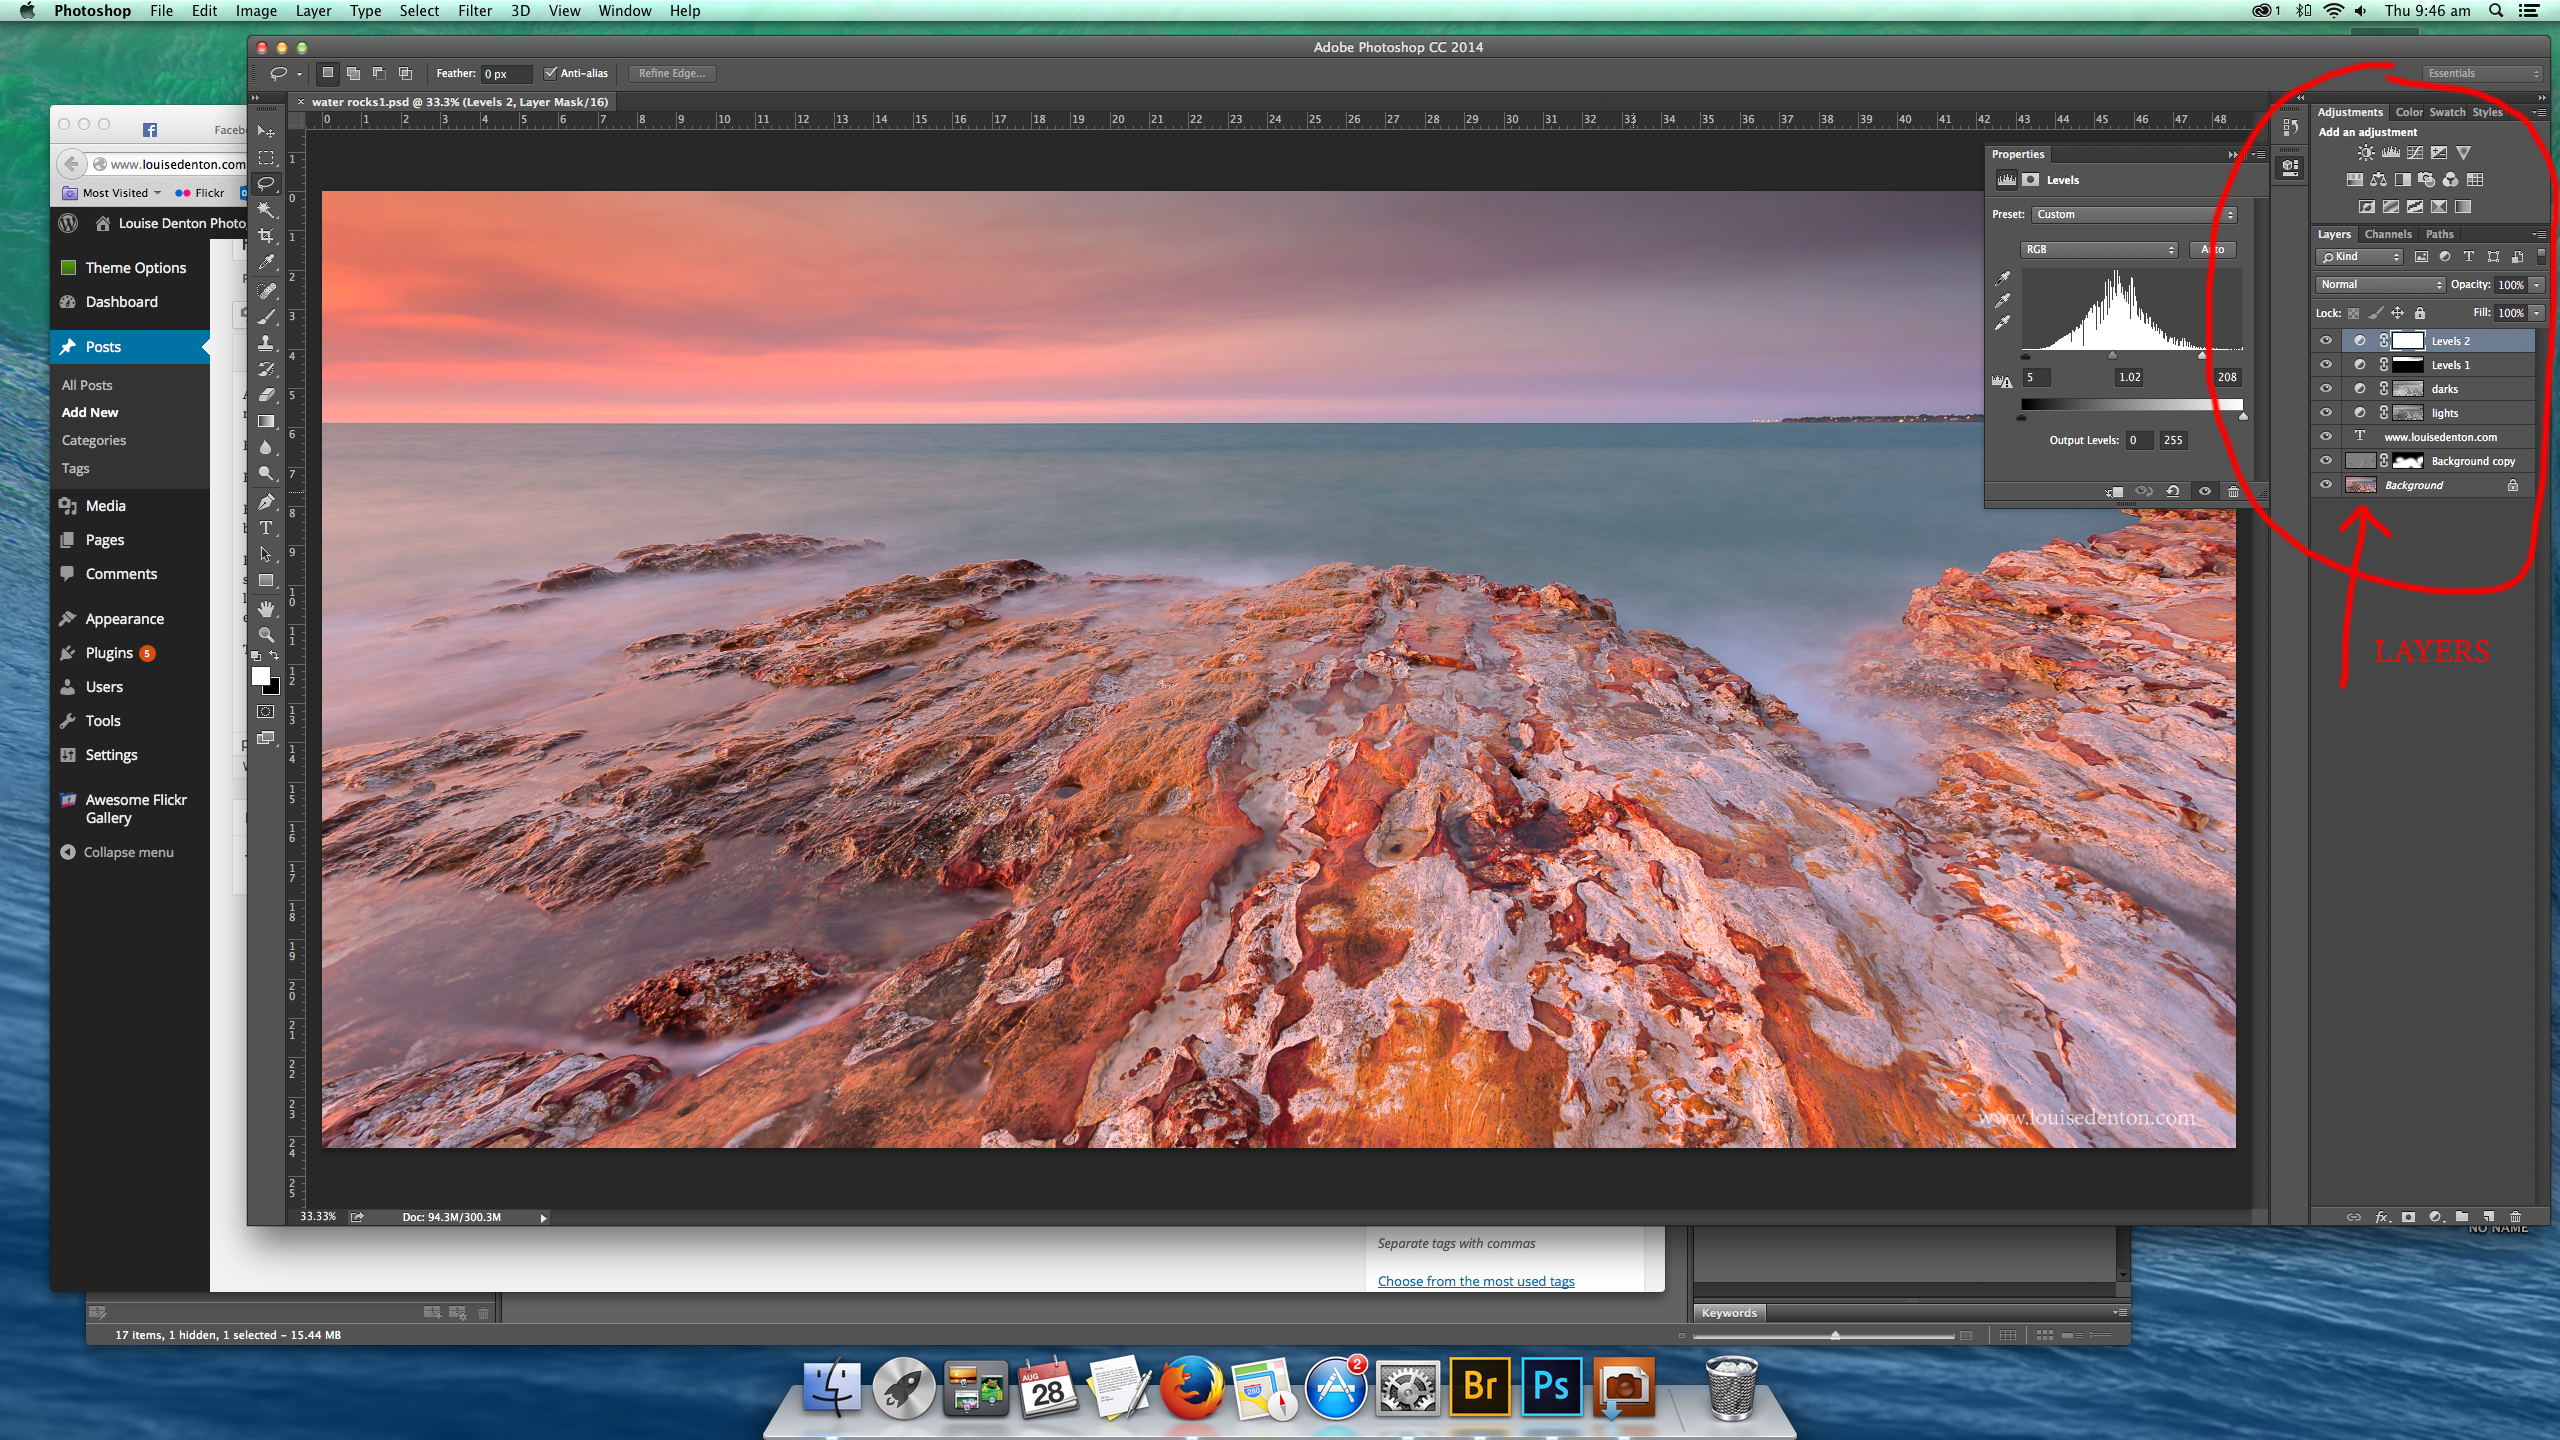
The below image is the final image of what I am going to run through, in a screen shot of my layout in Photoshop. The area I have circled on the right is the layers panel.
You can see I have a total of 7 layers; the Background layer is the base image straight out of Adobe Camera RAW. The next layer is a duplicate of this layer with a sharpening technique applied. The next layer is a text layer with my website. The next 4 layers up are all different contrast adjustments. Two of which use luminosity masks.
Then what on earth are “masks”?
Masks basically control where the adjustment layer is applied to. Masks go with and over the adjustment layer, to block out and reveal where the adjustment layer is shown.
You can see which layers have masks by looking at each layer. The rectangles shown on each layer represent the mask over the image. Where there is a pure white rectangle, the adjustment layer is revealed on the entire image (like the top Levels 2 layer in the image above). Where there is black on the rectangle, the black is hiding the adjustment from that part of the image.
I quite often apply a contrast adjustment to the image, but there are occasions where I only want to put contrast in to the sky. Above, you can see the second layer down from the top, Levels 1. This rectangle is both black and white. The white (revealed) is only over the sky, with the rest of the adjustment layer blocked out.
Later, I will also do a basic tutorial on the different ways you can select pixels to create your masks.