
I’ve just returned from a hike in the Katherine region known as the Jatbula trail – a combined photo-trip/remote camping getaway!
This walk is the first multi-day bush walk I’ve done in years and the first one my partner had ever done. The first thing I have to say about the Jatbula is that it was AWESOME! We loved it! The walk was really interesting and travelled through a variety of Top End habitats. Maybe we appreciated the varying landscape a little more than an interstate or overseas visitor, as we could really notice the smaller differences in the vegetation and the types of habitat as we were a little more familiar with the area.
We travelled through open woodlands on top of the escarpment, where we saw some amazing open views across hills, cliffs and buttes. There were monsoon pockets, bushfire-burnt regions, 2-metre high grasses, mushy marshy floodplains, amazing rock formations and colours, creek crossings and some of the best waterfalls I’ve seen in the Top End. We saw so many birds too (but thankfully only one snake and no face-to-face encounters with buffalo)!
For anyone considering walking the trail, but unsure on whether to go or not, my advice is definitely to go and do it! I’m going to share a heap of photos and my experiences of the trail over a couple of blog posts, and hopefully this will help (inspire?!) some people get out there and consider giving the walk a go.
My partner and I found the walk relatively easy – the terrain was mostly quite easy for someone fit and used to hiking. You obviously need to be fairly fit and able-bodied to walk for several hours in the heat, carrying 10kg or so in a backpack. There were a few hills on the first day but the walk was quite flat in general with just a few obstacles including creek crossings, some rocks and muddy patches.
We felt great at the end of each day. We had one day where we felt completely exhausted but that was due to the sun, the increase in temperature and humidity rather than the walk itself. We carried some re-hydration tablets which were definitely needed that day! On the following two hot days we walked with wet trek-towels over our heads to shade us from the sun ha ha!
A little about the Jatbula Trail…
For those who haven’t heard of this route, the Jatbula begins at the Nitmiluk Visitor Centre at the start of the Katherine Gorge, and traverses atop the western edge of the Arnhem Land escarpment for 62km finishing at Edith Falls. The Jatbula is one of the iconic Australian bushwalks and follows the traditional song line of the Jawoyn people.
The walk can be done in either 5 or 6 days; my partner and I chose the 6-day option and completing the journey in this way means the last 16km is split in to two days (11km and 5km). When walking on a 5 day schedule this makes the last two days both 16km walking days. As a 6-day option, the last campsite is Sweetwater pools which is above Edith Falls and accessible to day walkers (keep this in mind if you’re having an early morning “bath”!).
Walking the trail in 6 days splits up as follows:
Day 1: 8.3km
Day 2: 11km
Day 3: 10km
Day 4: 16.8km
Day 5: 11km
Day 6: 4.5km
As per the below map from the Northern Territory Parks and Wildlife website on the Jatbula Trail.
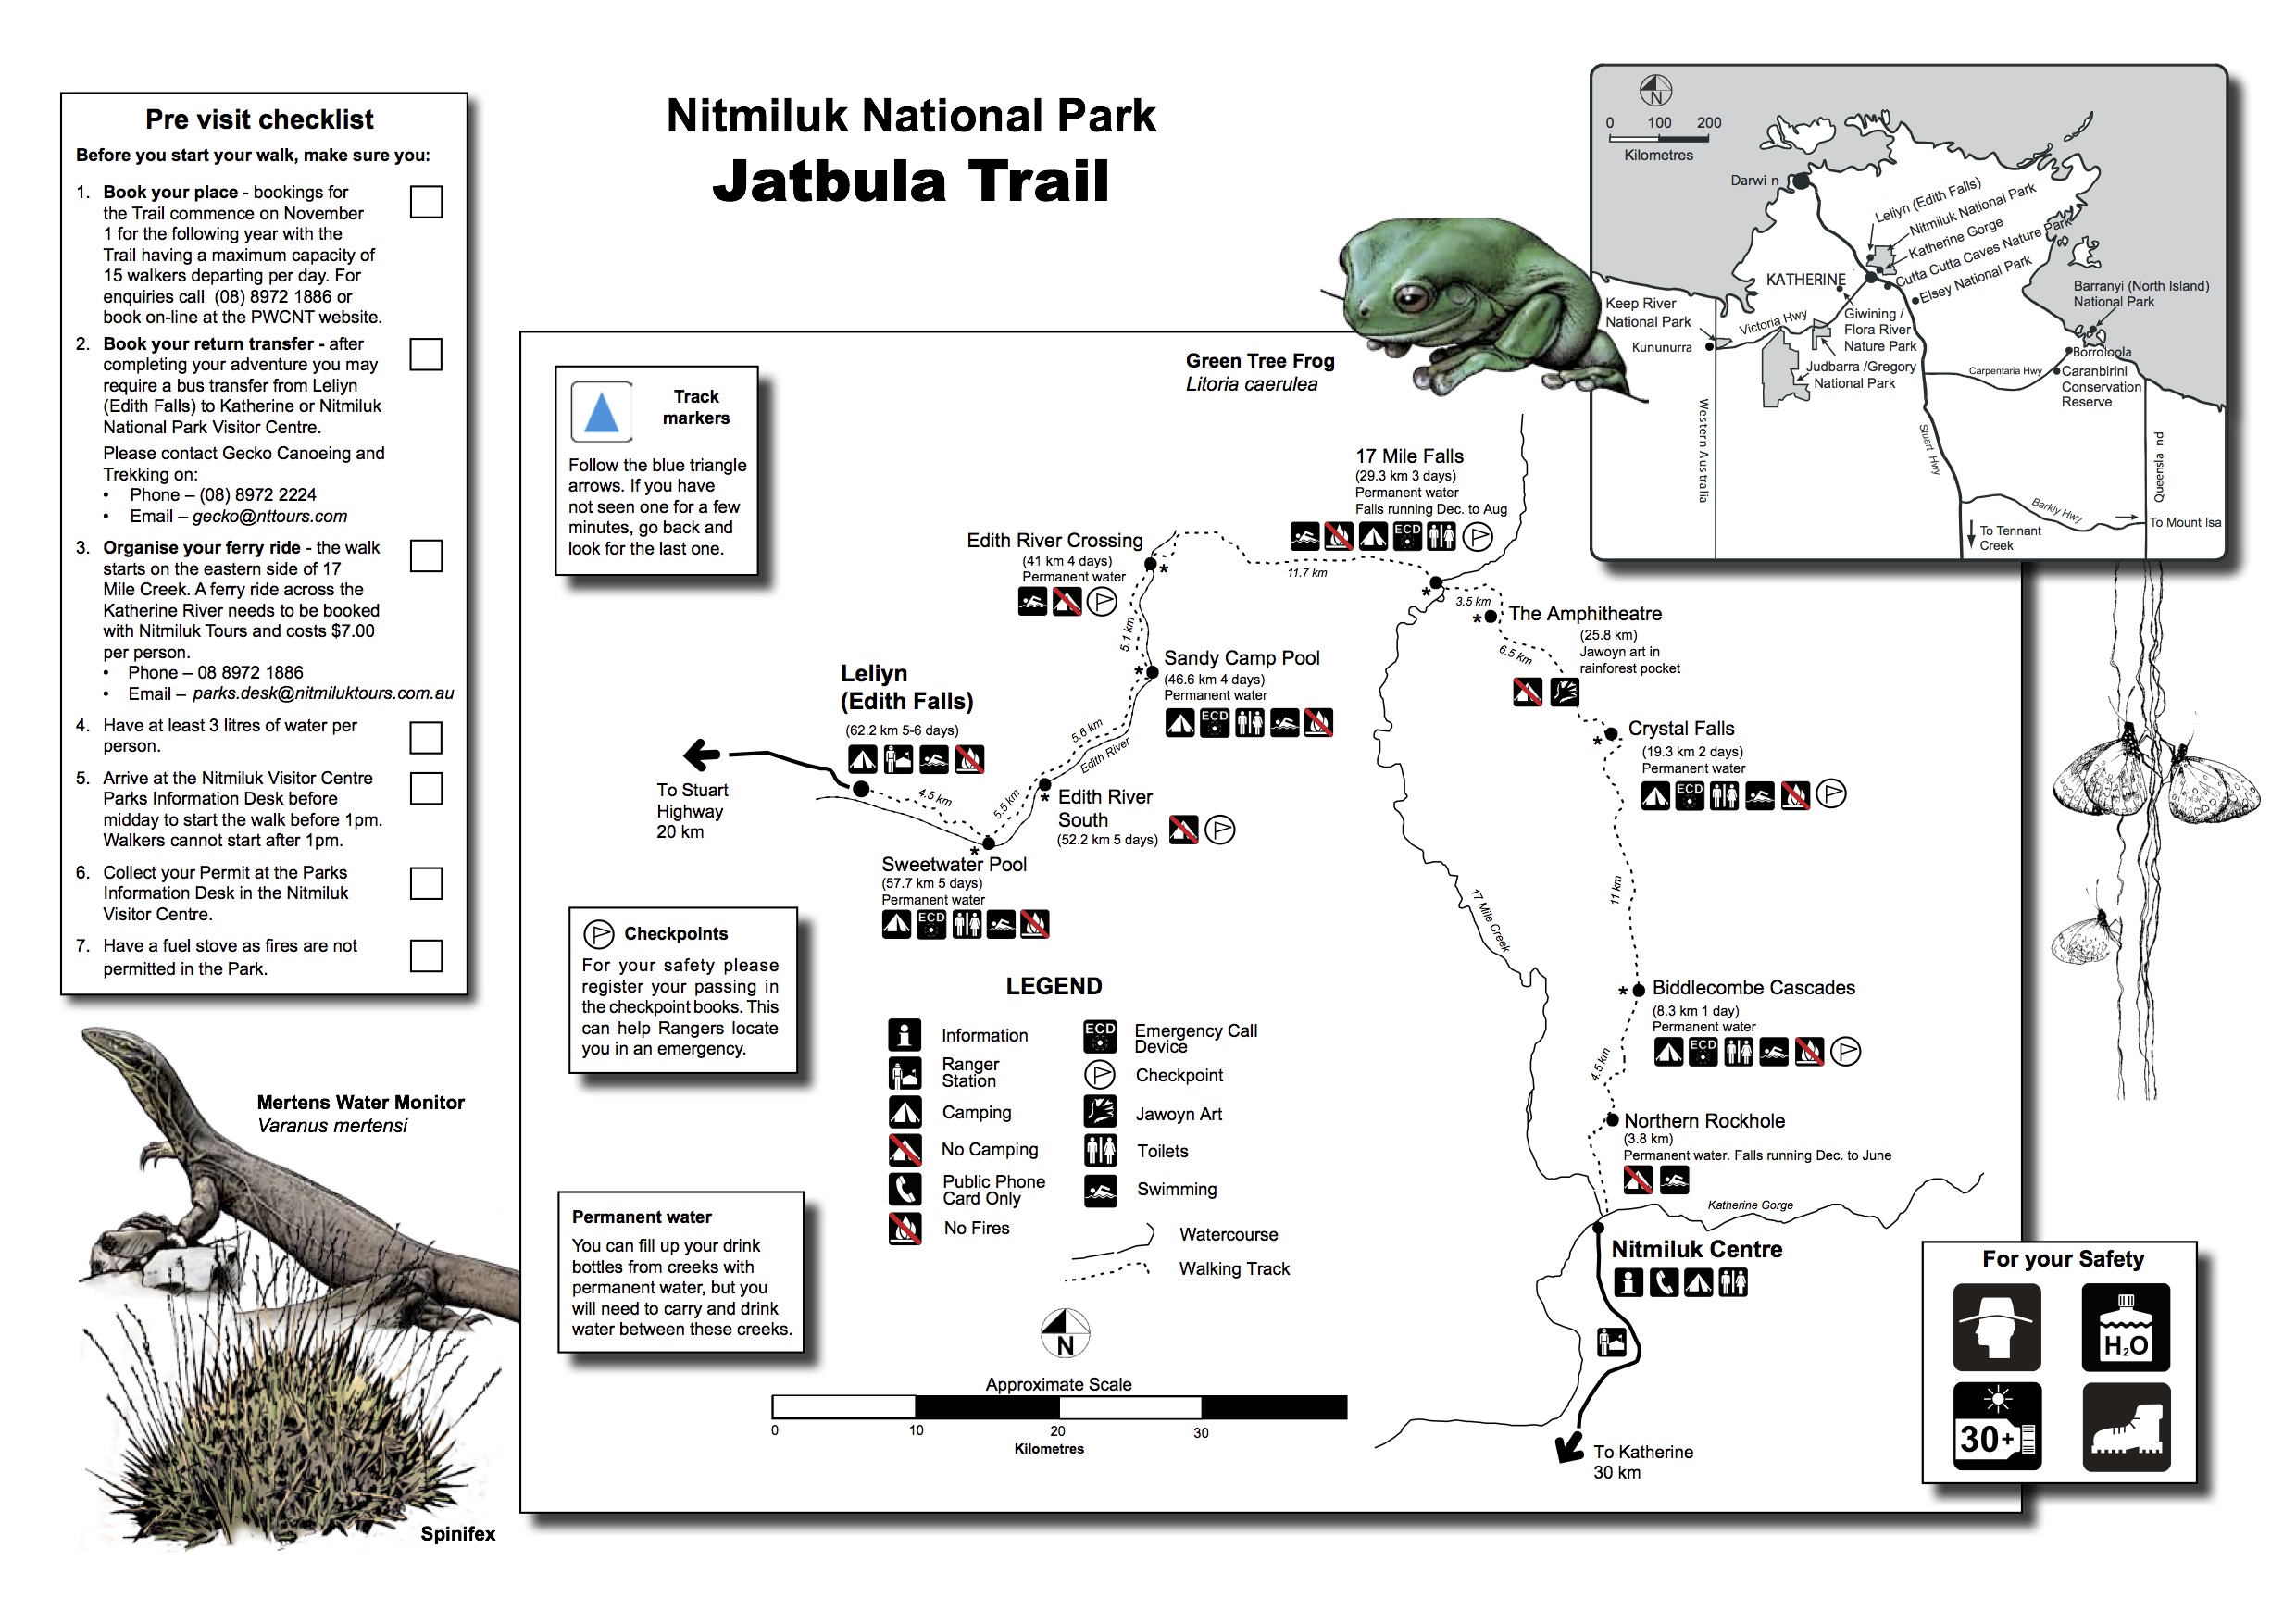
The camping….
As you can see by the map, there are designated camp sites marking the end of each day. At each of these campsites is a drop toilet (which were in awesome condition, probably the best composting toilets I have ever used ha ha ha!) and permanent running water to fill up with.
The campsites were gorgeous along the entire route: each night we were next to a beautiful waterfall or pool. The only problem with that was the mosquitoes. The first day I didn’t notice them at all, but for the next five nights our routine was waterfall/sunset photography – dinner – dive in to the tent for refuge from the blood-sucking insects! Mozzie coils and repellant have been added to the packing list for the next trip!
We were lucky that my partner and I were the only group booked on to the trail on our day. That meant we had each beautiful spot to ourselves every night! When applying for a permit and booking a spot on the Jatbula trail, you must spend one night at each of the designated campsites before moving on to the next one on the following day. This keeps the walkers spread out: each day is limited to a maximum of fifteen walkers per day. Our day was just us! When filling out our names in the checkpoint notebooks, we noticed there was a group a day in front of us which was a bit of reassurance if something went wrong!
Each campsite also has an emergency calling device (ECD) if there is an emergency, and we also carried a PLB (personal locator beacon) which we could have activated in an emergency. That’s something to keep in mind if you are considering doing this walk, you are in the wilderness and if there is an emergency or a problem you need to be prepared to deal with that! You have to be completely self sufficient for the duration which included carrying the tent, food, and water. As I mentioned already though, you can fill up on water each night. We carried a 3 litre CamelBak each which was plenty of water for us for each day.
The gear….
My partner and I obviously split our gear between the two of us. I had my camera gear which weighed probably about 3kg, so my partner carried our tent and mattresses to even out the weight. My backpack probably came in at around 10kg and his at around 12kg. We had no way to weigh them before we went which would have been good! We’re both pretty minimal packers anyway, and it’s really important I think to try and keep the bags as light as you can… there’s nothing worse than having to lug stuff you don’t need. Kilos really mount up when you’re carrying your mini world on your back.
The other thing is that I reckon it’s really important to get comfortable gear: particularly the backpack and boots. I bought myself an F-stop Loka UL backpack for this trip. It’s a hiking backpack meant for photographers… it had a great support/suspension system with heaps of pockets and access points including one on the back for a camera-gear-insert. I’ll probably do a review of this bag at some point… at nearly $500 it was one of the most expensive bags I’ve ever bought (for hiking or camera gear!), but it was definitely worth it – even at the end of the six days I had no aches or pains from using this bag. After taking it off for an hour it was like I never had one on! It was super comfy and really practical.
So I carried a 40L backpack with the Loka, which wasn’t quite full. My partner had a 65L backpack which wasn’t full either.
The boots I had a bit of an issue with…. Up to day 3 I was fine! But by day 4 I had blisters and bruises all over my feet. My trusty 10-year-old boots have either worn out or my feet have grown ha ha. My partners boots were fine, he had no troubles at all! At the end of the 6 day trip, we both said we could have carried on walking like that for another 6 days (if I had better boots!). My last day was a struggle on the feet in a big way…. I’m just glad my issues didn’t start on day 1! I had just enough plasters to get me through.
So if you do get new boots for the trip, definitely make sure you break them in and do a few walks first.
So we had the two backpacks. My partner carried a two-man Mozzie-dome and fly, and the two therma-rest self inflating mattresses. We had a sleeping bag each and a 3L CamelBak each. We bought a great new little stove – really lightweight and packed into its own pan set which we could also keep the gas canister in. I’ll have to check the brand, but we purchased it from the NT General Store on Cavenagh Street in Darwin. It boiled water in around four minutes and was really lightweight too. Clothes-wise we only took a couple of spare shirts and spare socks/undies each, the only toiletry item was a toothbrush and toothpaste! We did take a jumper and long pants which we only needed for the first night. We had one cool night and then four much more humid days and warmer nights. Maybe thats why there were so many extra mozzies after day 1…?!
Camera gear….
My camera gear took up a bit of weight and space even though I down-sized it in a big way!
I took the 5D Mark III with one lens – my new 16-35mm F4L lens.
I took the Lee Filter holder and two filters: a 0.9 Graduated Neutral Density (also usable as a solid ND) and a circular polariser.
I’d bought a new lightweight carbon fibre tripod for this trip too (my old alu Manfrotto tripod is probably near on 3kg); a Sirui N2204 tripod with a K20 ball head weighing a total of 1.3kg. I might do a review on this later too as it was a really great tripod. Folded up small, works great and feels really good quality at a fairly affordable price ($625 delivered which might sound expensive but for a carbon fibre tripod it’s really reasonable).
I bought an extra camera battery bringing my total up to three fully charged batteries. That was just the right amount, I used 2.5 in the six days including time shooting Edith Falls on the 6th night.
I took the remote shutter release and a cleaning cloth, a couple of spare memory cards and….. I think that’s it.
I would have loved to be able to carry the telephoto as well but I’m still undecided on whether it’s worth carrying the extra 2kg just to have the option of an extra lens. On a shorter trip I probably would.
And off we went!
Day 1…
Beginning the day at the Nitmiluk Visitor Centre, we paid our fees and booked our ferry crossing for 9am. Jatbula walkers hop on one of the gorge cruise boats just to get across the Katherine river and start the trail. The ferry left at 9am and after a clamber up the bank we began on our journey!
After a short skip through some long grass(!), the walk begins in a fairly open woodland section. The first 4km stays fairly flat and under a 200m elevation, as we journey toward the first waterhole of Northern Rockhole.
You can access this location as a day walker from the Nitmiluk Visitor Centre by completing the same ferry crossing as the Jatbula walkers, but instead of continuing on for an extra 60km, you return to cross the river and return to Nitmiluk at the end of the day.
Swimming is not permitted in Northern Rockhole due to the potential presence of saltwater crocodiles: the only non-swimming location on the trail. We stopped here for lunch and filled up from the emerald pools to boil water for our first camp lunch on the shady banks.
The falls were only just still flowing after a fairly low rainfall year in the region. I can imagine these falls would be stunning to see in the wet, but we were greeting with a single trickle falling from the escarpment. These waterfalls were very typical of falls throughout this region and kind of reminded me of Jim Jim falls. The pools were a gorgeous shade of green and surrounded by pandanus with crimson finch and an azure kingfisher.

The escarpment still looked a great shade of red even in the midday sun, so we took a couple of shots and continued our walk to Biddlecombe Cascades.
The remaining 5km to Biddlecombe ascended a little higher up the escarpment to around 240m elevation.
We passed a few smouldering areas of bushfire but nothing to be concerned about. Back-burning or “burning off” is a method used in Top End parks based on aboriginal methods to eliminate tinder which can fuel wildfires later in the season. The bush is burned by the rangers at this time of year whilst still wet from the rainy season, which creates a slow burning (usually) fire to eliminate the dry grasses, etc. Later in to the dry season the onset of the winds, dry air, dry ground and heat becomes a hazard for wildfires. Back burning basically prevents large wildfires that happen later in the dry season.
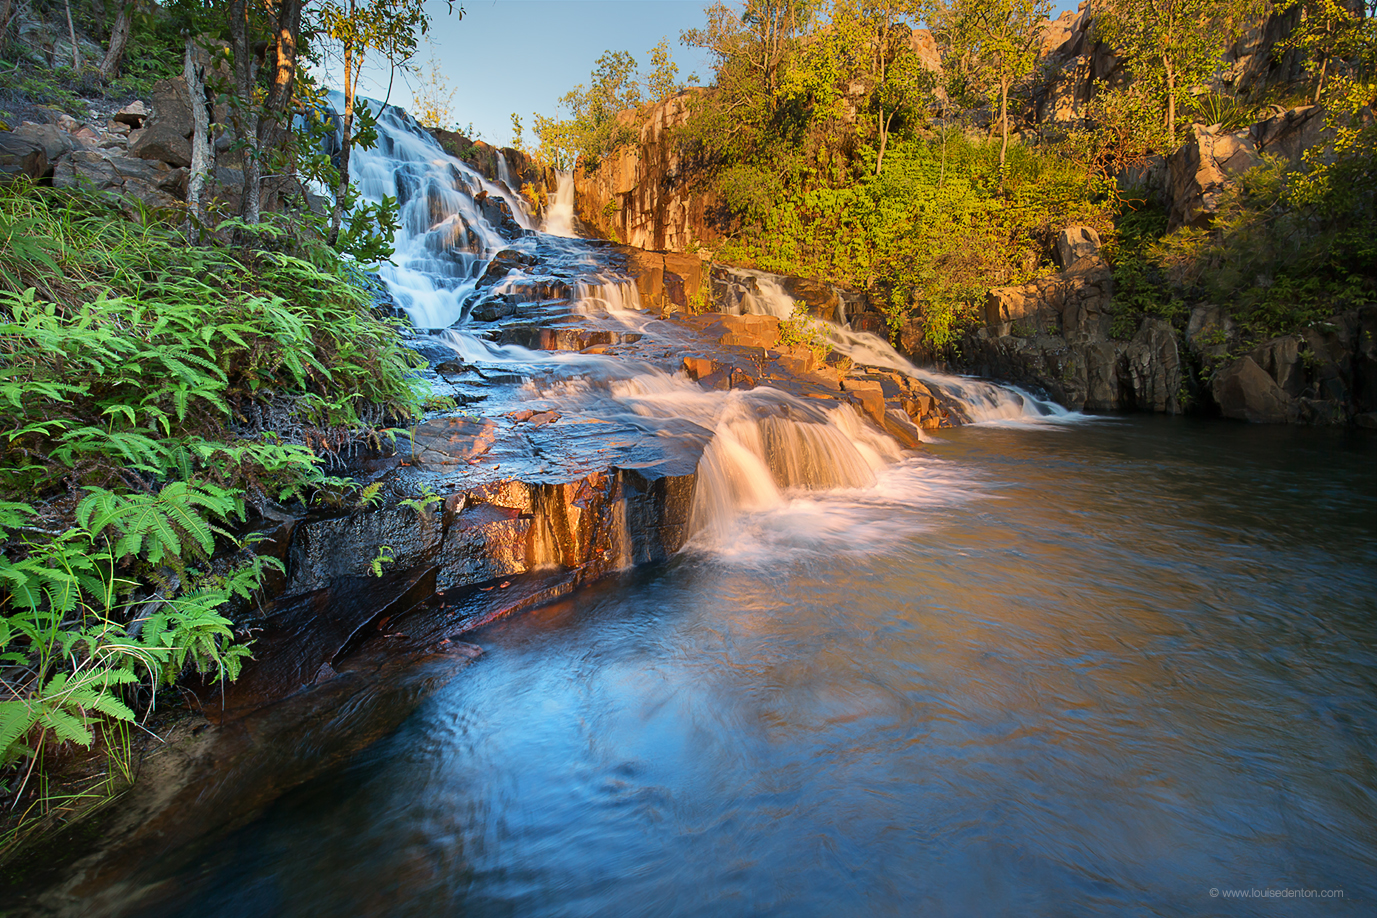
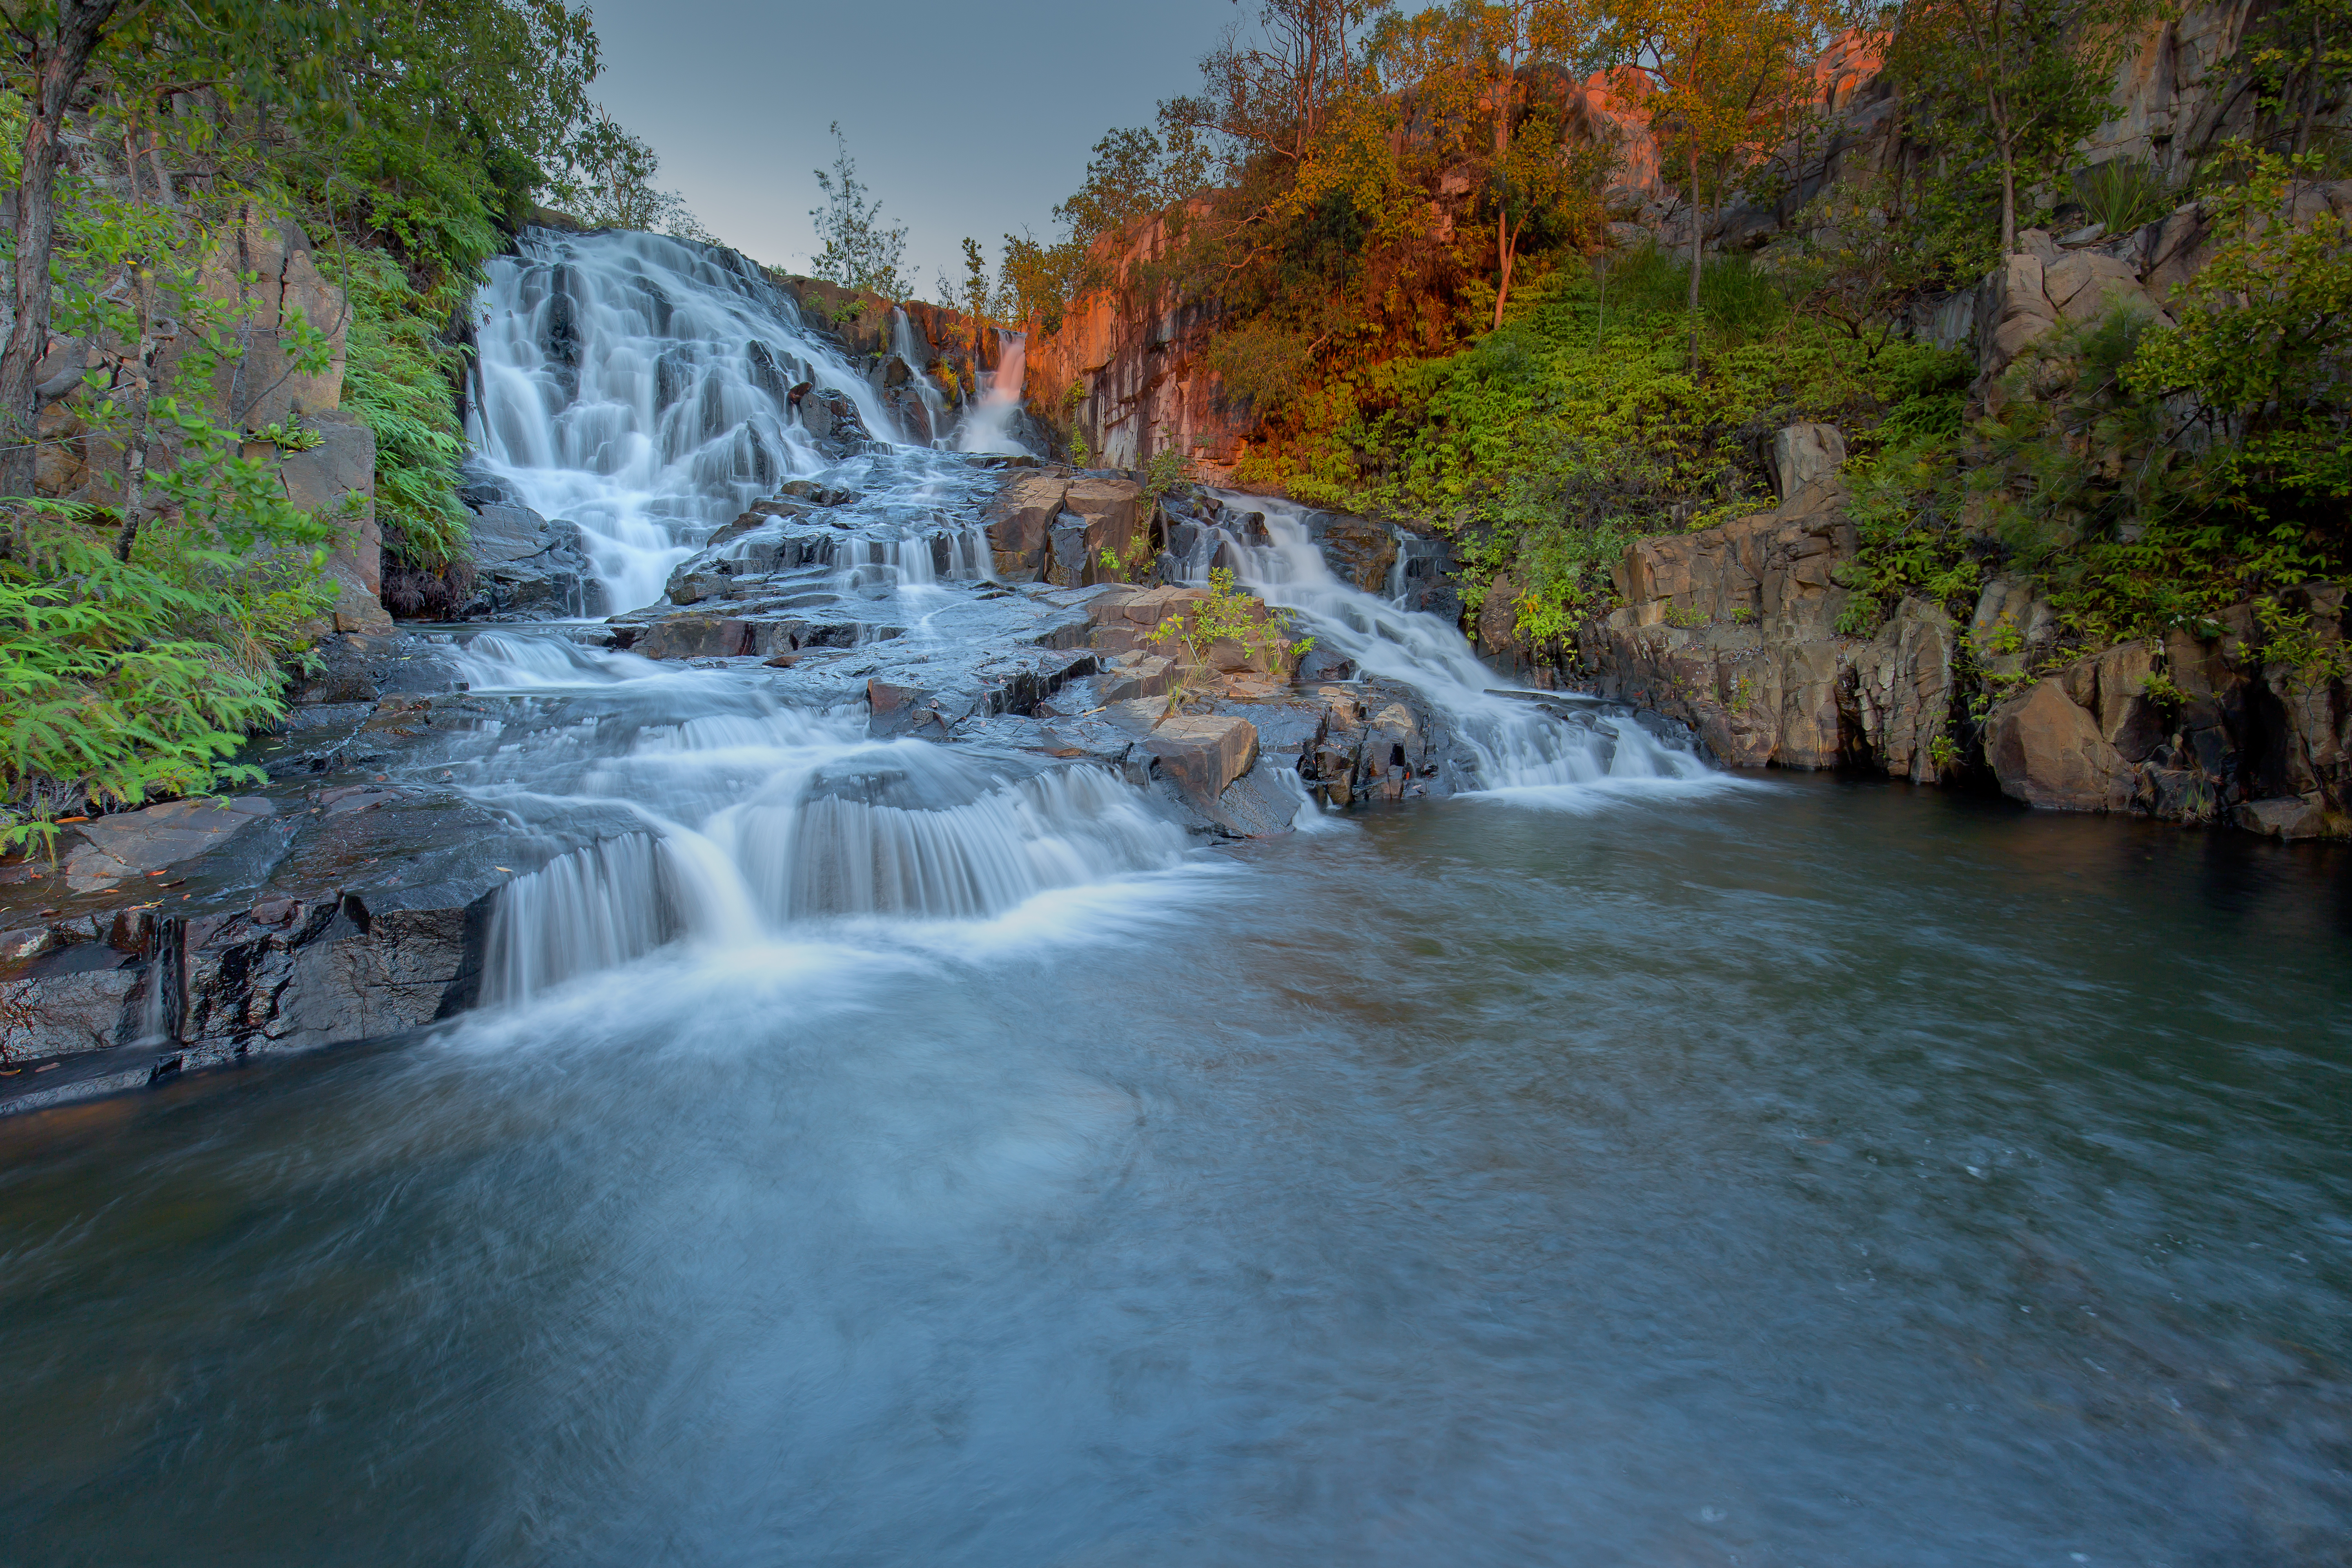
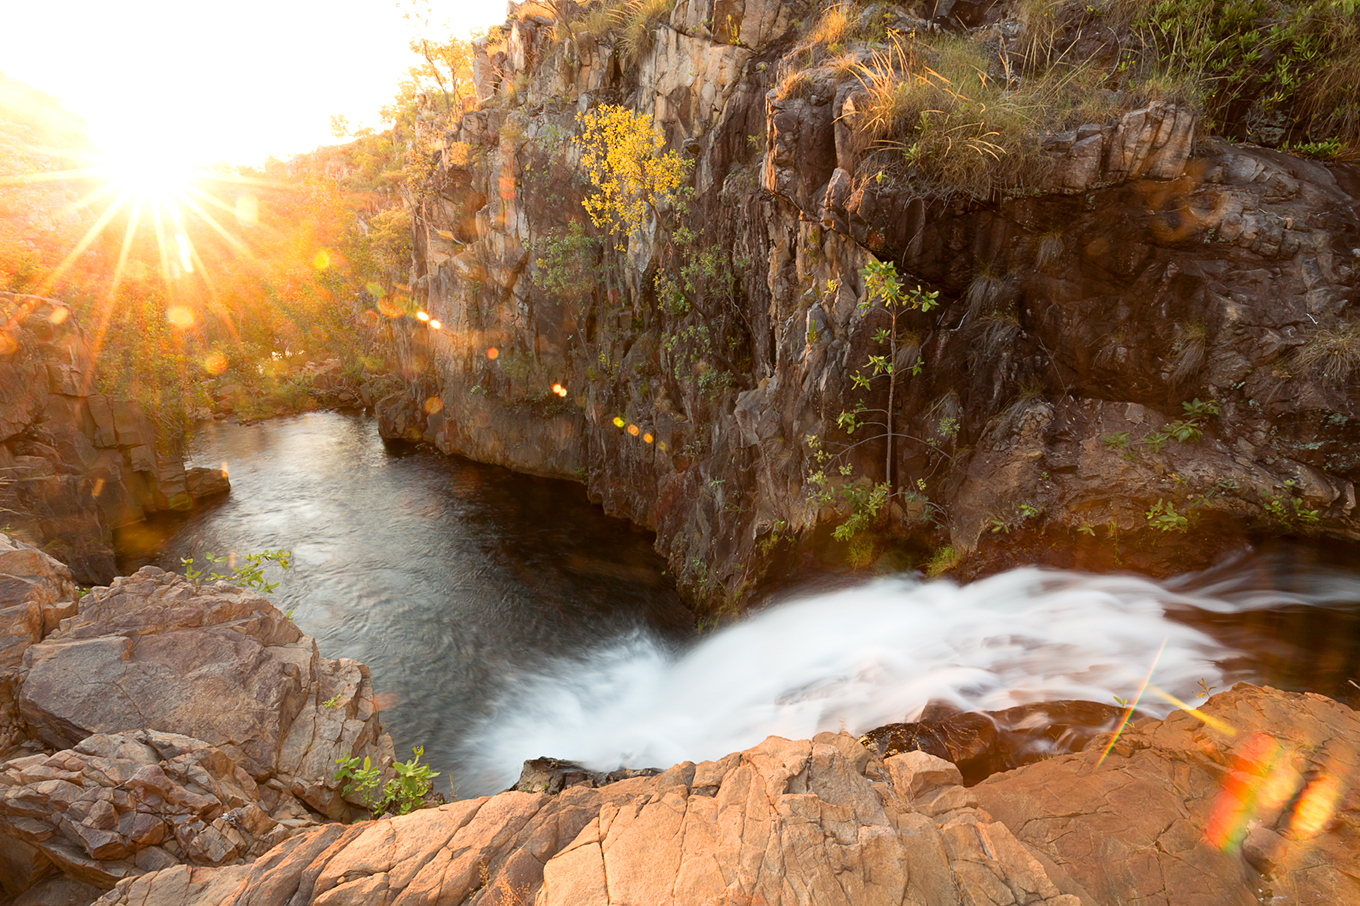
On arrival our campsite had recently been burned too, but there was a small grassy area left where we pitched our tent. Following the trail a little we found our way to the Litchfield-esque creek at we found later forms the top of the Biddlecombe Cascades. By heading downstream a little the creek drops off into probably my favourite Top End waterfall yet!
Biddlecombe Cascades looked nothing like a typical Top End waterfall falling straight off the escarpment… It branched off and looked more like something from a tropical rainforest region like Cairns. It reminded me a little of a smaller version of Barron Falls in Far-North-Queensland if you’ve been there. We were at Biddlecombe Cascades just in time for the right light on the falls too.
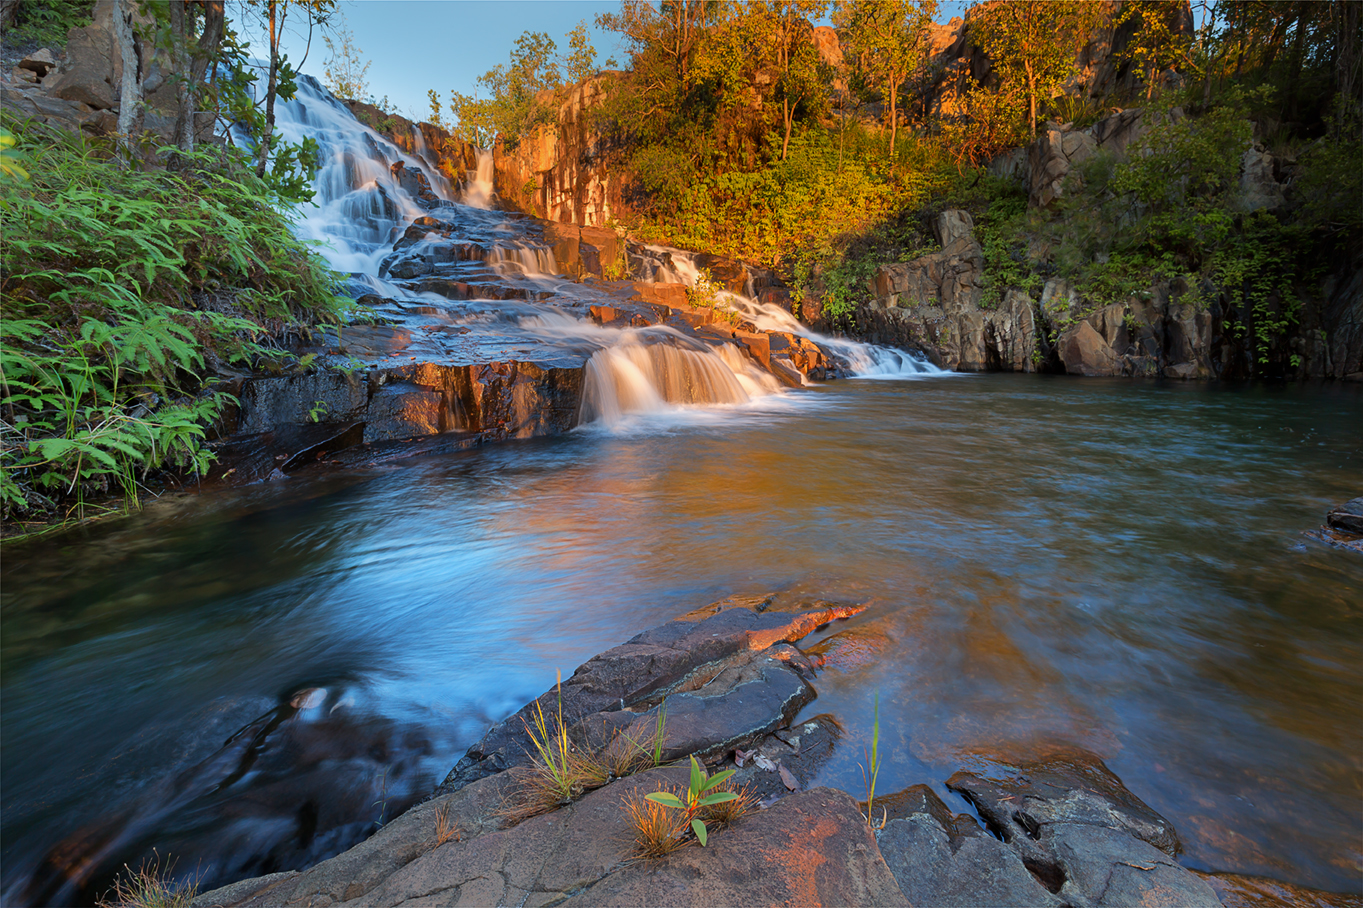
Looking behind the falls actually continued through a gorge and looked as though it dropped off again down another [unaccessbile] cliff.
A great start to the Jatbula – looking back I think this might have been one of my favourite camp spots.
More photos to come…..
All are available as prints to purchase on request